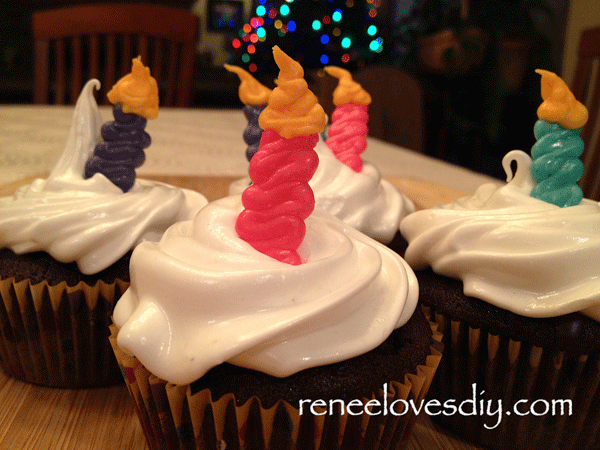
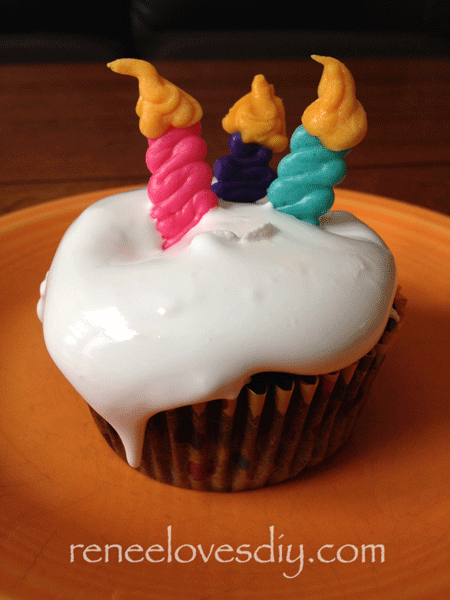
White Chocolate Candles make a great garnish for all your birthday cakes and cupcakes!
If you are looking for less fire on your celebratory cake, make white chocolate candles of your very own! Bonus – you can eat these delicious and adorable candles!
What do you need to make 18 candles:
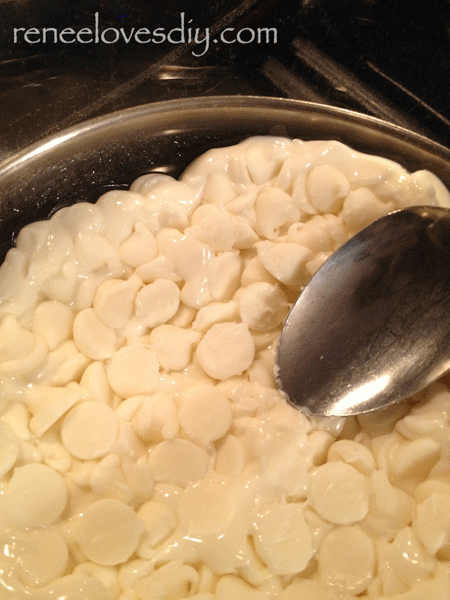
1 Cup White Chocolate Chips
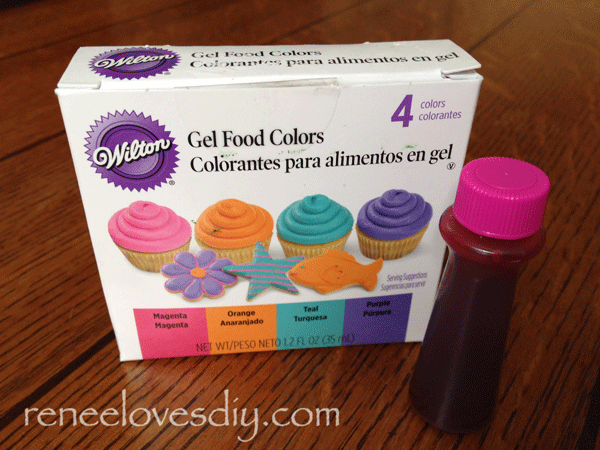
Gel Food Coloring
Place one cup of white chocolate chips in the bowl of a double boiler. Heat the water to a low simmer and let the chips melt slowly. Be patient!
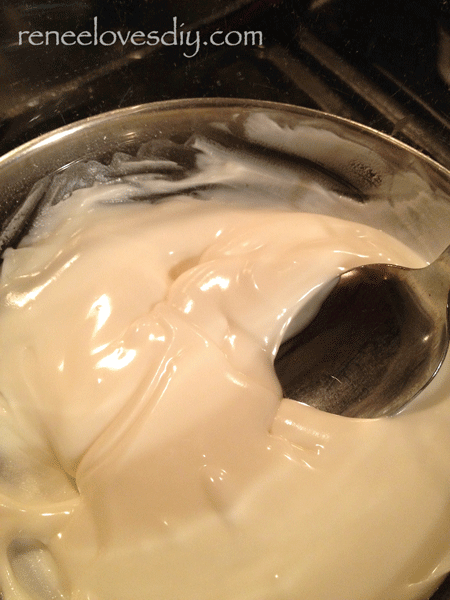
After the chips have begun to melt, stir until smooth.
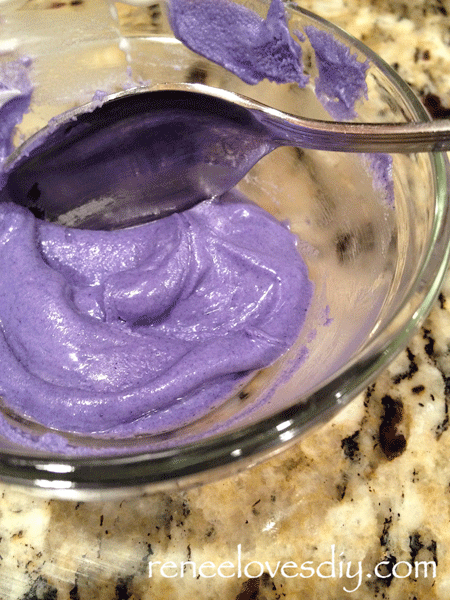
I divided the melted chocolate into 4 small bowls and blended in the gel coloring. The chocolate began to harden as it cooled, but by microwaving at a low power it softened again. I just didn’t work fast enough!
If you use a liquid food color the chocolate will start to seize. If this happens, you can make it smooth again by adding coconut oil. Using gel colors will prevent this from happening!
Blend the gel food coloring into the white chocolate until the color is uniform.
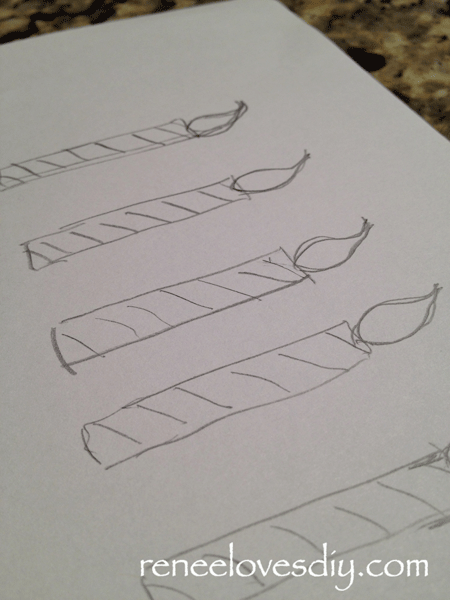
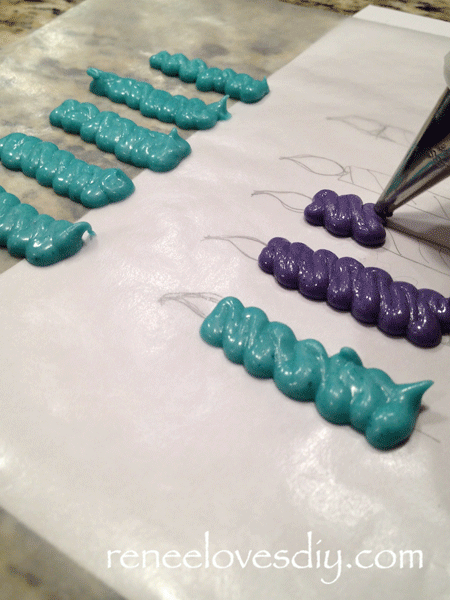
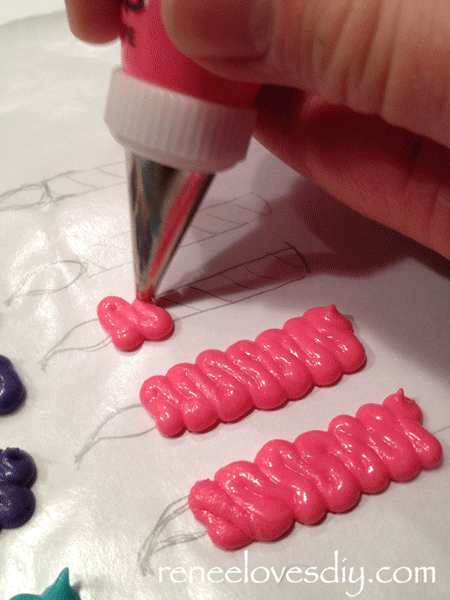
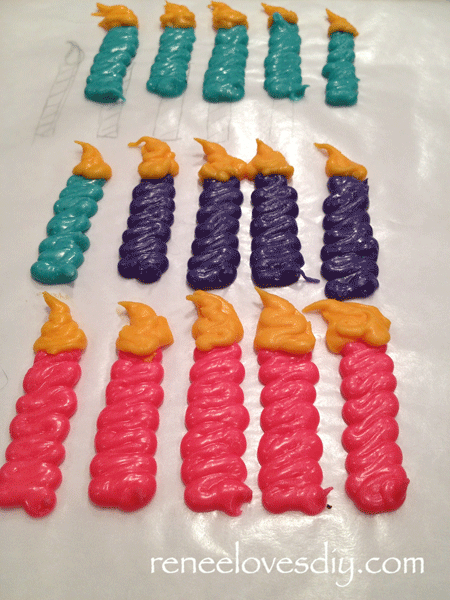
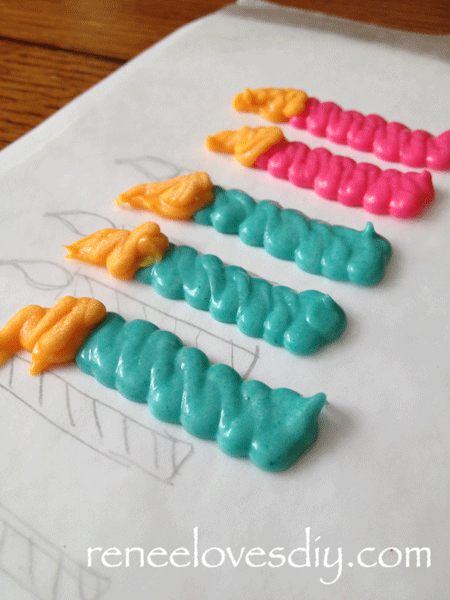
I drew out a number of candles to provide a pattern for me to follow. I then covered the drawing with a piece of wax paper and began piping the colored white chocolate! By sliding the wax paper over the drawing I could use my template drawing over and over.
Using a number one round decorating tip for the candles and the flame worked very well! This is so easy to make, you must try it for yourself!
Everyone will enjoy these tasty and beautiful candles!
Who wants a delicious brownie with none of the flour and all of the delicious taste? I do!
This recipe is one of my go-to desserts when having a party.
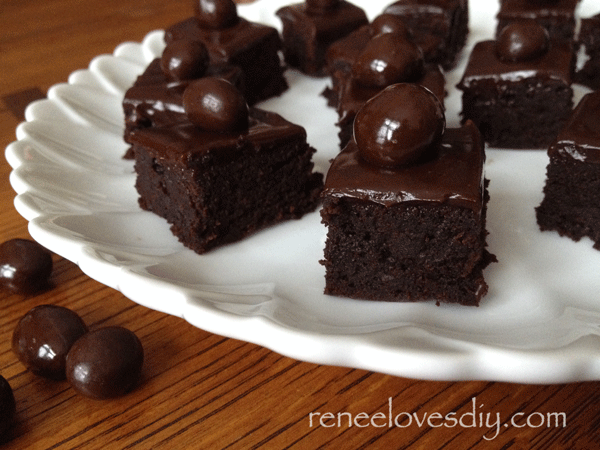
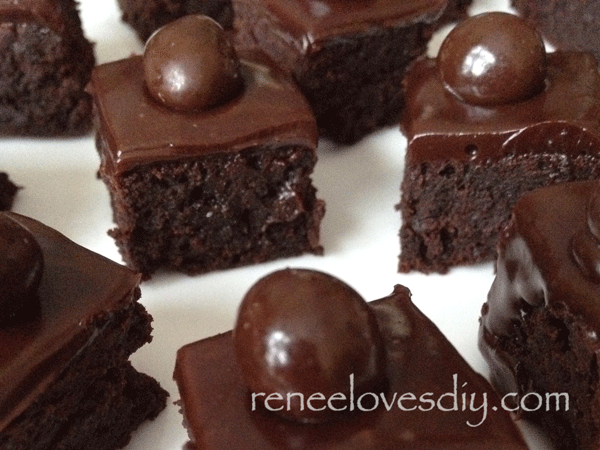
I like to cut these brownies into bite-sized pieces and top them with a chocolate covered espresso bean! Guests seem to like desserts that are small – why? I think it’s so they can eat 5 of them and not feel guilty – hmmm.
Here is the recipe for you to try!
Flourless Mocha Brownie
½ cup unsalted butter
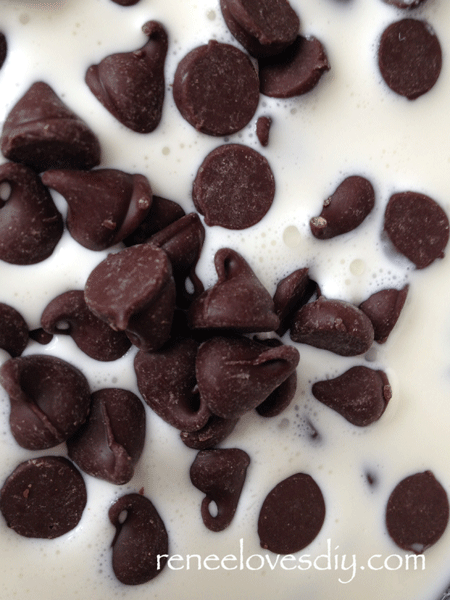
1 cup semi-sweet chocolate chips
½ cup sugar
1 tsp vanilla
3 eggs
dash salt
½ cup cocoa powder
2 tsp Espresso Powder
Genache Icing
2/3 cup cream
1 cup chocolate chips
Chocolate Covered Espresso Beans
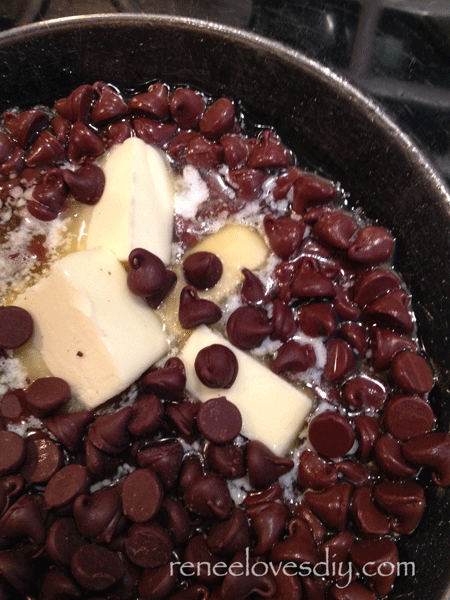
Heat your oven to 350 degrees and prepare a 9” square pan by spraying generously with cooking spray. In a double boiler, melt the butter and 1 cup of chocolate chips over barely simmering water. Whisk until smooth.
Melt Butter and Chocolate Chips in a double boiler!Chocolate Mixture for Flourless Mocha Brownies!
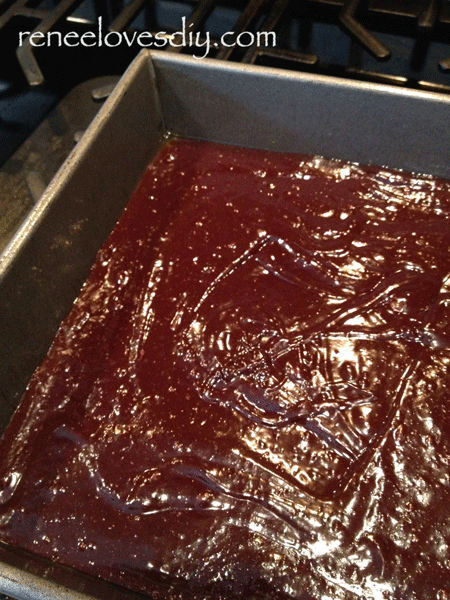
Remove the top of your double boiler from the heat and stir in the sugar, vanilla and eggs. Mix well. Sift together the cocoa powder, espresso powder and salt and add this to the egg mixture. Stir until just combined and pour into your prepared pan.
Flourless Mocha Brownie is ready for baking!
Bake for 12-15 minutes until a cake taster comes out almost clean.
Flourless Mocha Brownie ready for it’s Genache glaze!
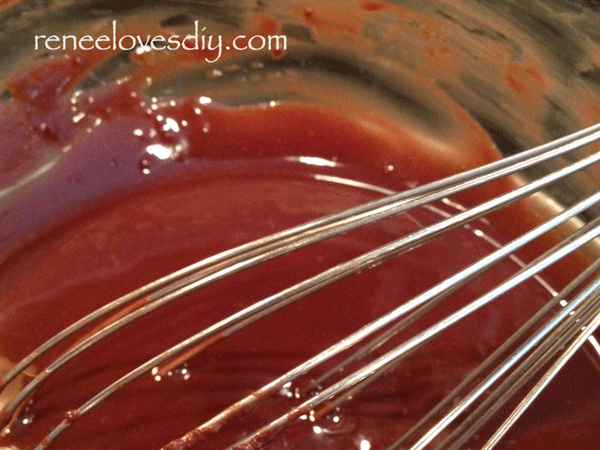
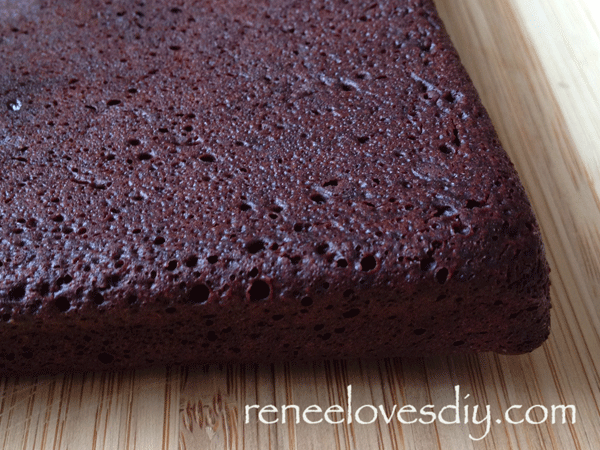
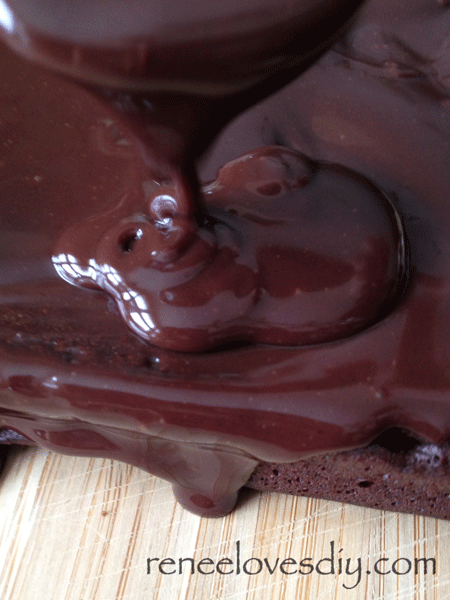
Allow the brownie to cool in the pan for 10 minutes then turn over onto a cutting board. Allow the brownie to cool completely. In a double boiler melt the chocolate chips with the cream over barely simmering water.
Prepare Chocolate Genache with Cream and Chocolate Chips!
Whisk until smooth. Remove from the heat and allow to cool slightly before spreading over the brownie layer.
Drizzling Genach over the Flourless Mocha Brownie!
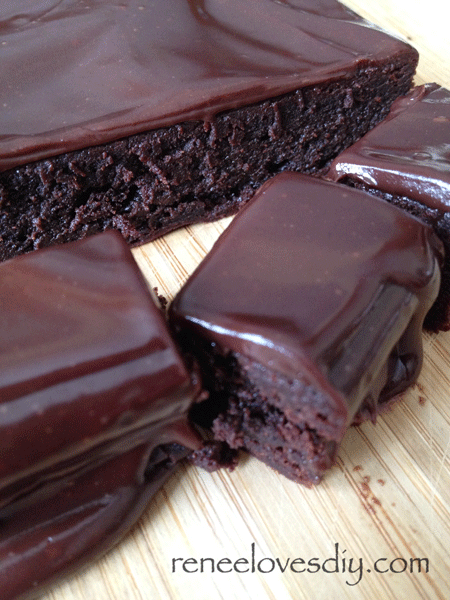
After the genache has stiffened, cut the brownies into bite-sized pieces. Top each brownie square with a chocolate covered espresso bean. Enjoy!
Flourless Mocha Brownie
If you clean your knife after every cut, you will get perfect pieces with no crumbs!
Flourless Mocha Brownie
Here is an easily printable recipe for you![gmc_recipe 1725]
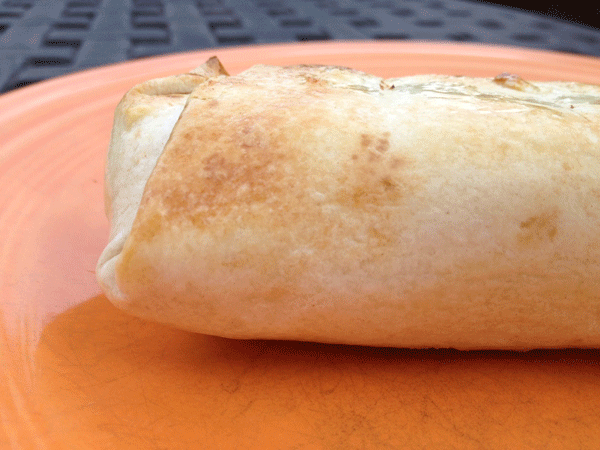
Here is a breakfast burrito recipe that is absolutely delicious! The combination of eggs, bacon, peppers & onion and just enough jalapeño to give this recipe a little kick, will get your day going!
Here is the recipe so you can enjoy them too! A printable copy can be found at the bottom of the post!
Breakfast Burritos
This recipe makes enough to generously fill 4 – 10″ tortillas
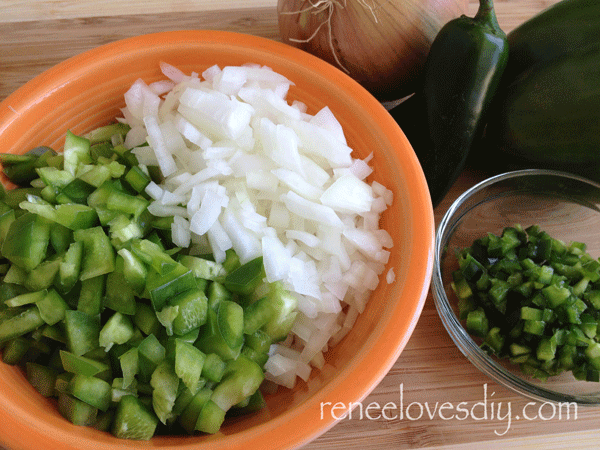
1/2 small onion, diced
1/2 green pepper, diced
1 jalapeño, diced (optional) At my house – it would be 2 jalapeños and – Not Optional!
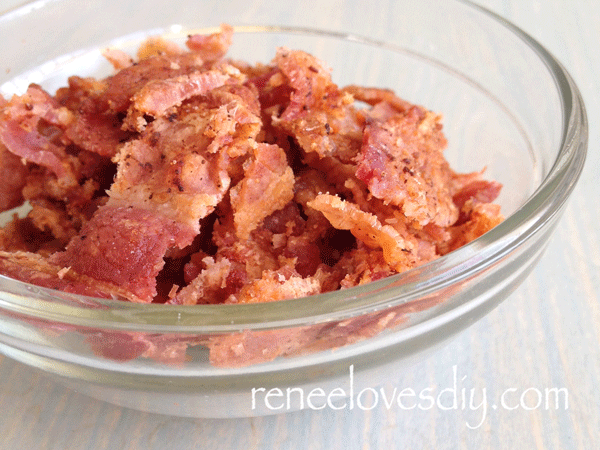
4 slices of cooked bacon, crumbled
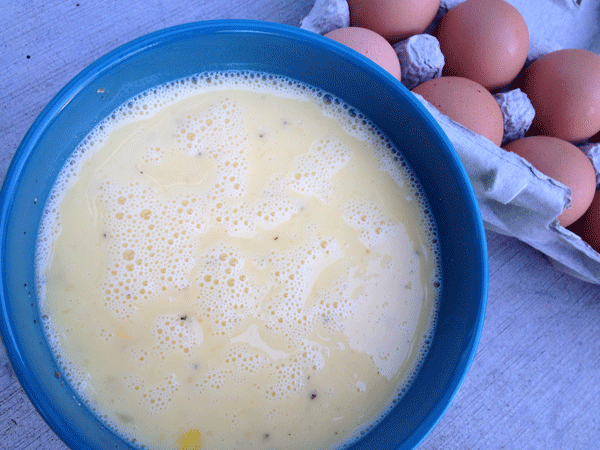
8 eggs
1/2 cup milk
1&1/2 cups grated cheese – I like pepper jack & cheddar mixed
salt & pepper to taste
small amount of oil to prepare the frying pan
Egg Burrito Ingredients
Saute the onions, pepper and the jalapeños until the onions are translucent and the peppers are soft. Transfer to a medium sized bowl.
Bacon for an Egg Burrito
Crumble your cooked bacon!
Scrambled Eggs for Egg Burrito
In a medium bowl, mix the eggs and milk. Whisk until well blended and season with salt and pepper.
Scrambled Eggs for Breakfast Burrito
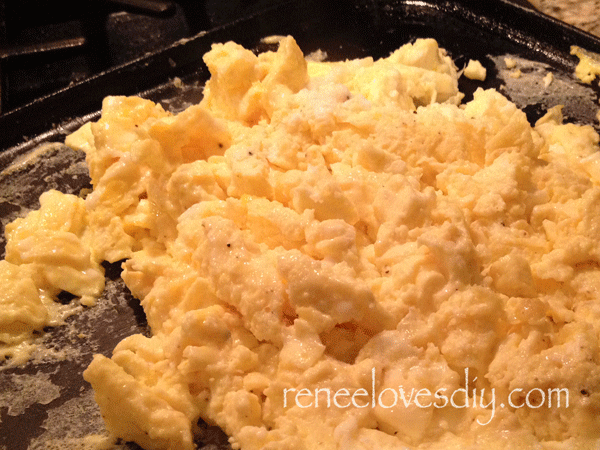
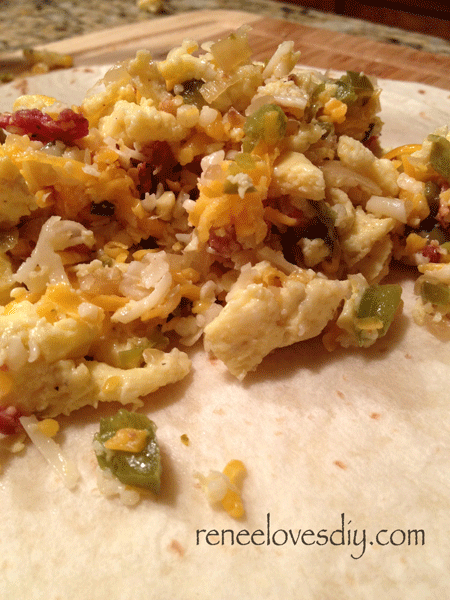
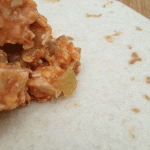
Heat a greased skillet over medium heat. Pour the egg mixture onto the heated pan and gently stir until the eggs are set. Transfer to a large clean bowl. Add the onion/pepper mixture, crumbled bacon and grated cheese. Mix until blended. Check seasoning!
Egg Burrito
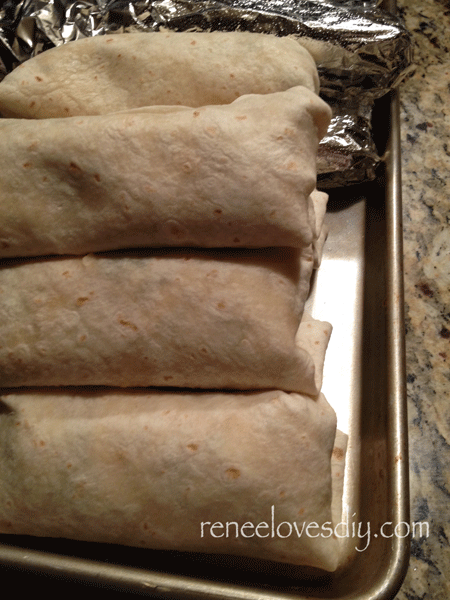
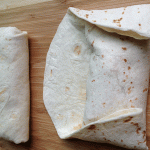
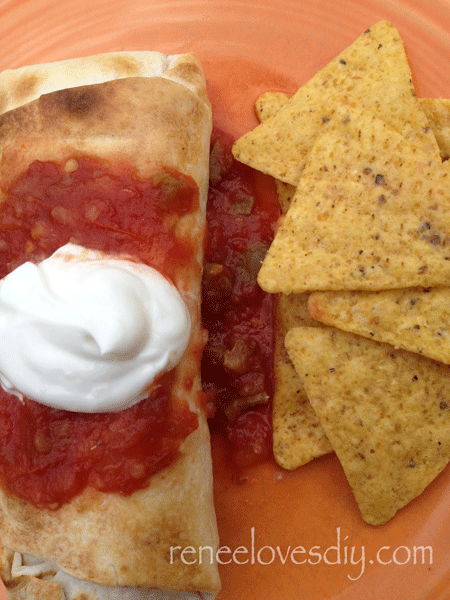
Place one fourth of the mixture onto a warmed tortilla. Fold up and enjoy!
They are delicious!
Here is the Printable Recipe!
[gmc_recipe 1954]
Delicious Egg Burritos
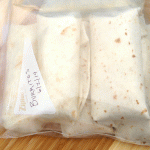
When I make Egg Burritos, I like to make a few extras to throw in the freezer!
Delicious Egg Burritos!
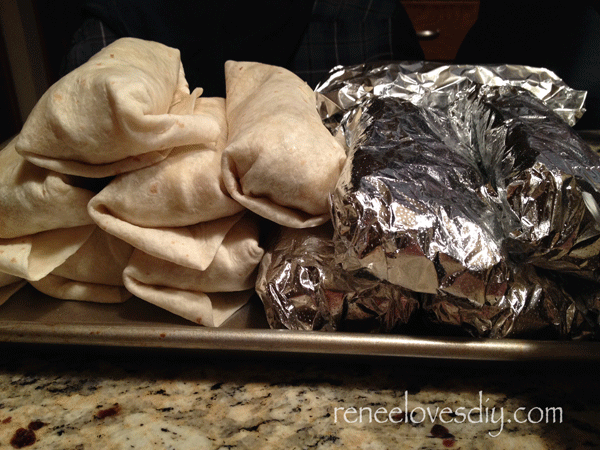
The last time I prepared these burritos I needed 40 of them. My husband was participating in a family fishing tournament and he needed to provide breakfast for 27 fishermen! I came up with the idea of preparing the egg burritos and freezing them so it would be easy to transport them and then simply reheat them in the oven!
Now you know why I have pictures of mounds of burritos! I made piles and piles that day. We also wrapped each burrito in aluminum foil to make it easy to prepare them in the oven!
I am including the recipe for 40 Breakfast Burritos – for anyone who is as crazy as I am!
40 Breakfast Burritos
3 large onions, diced
6 green peppers, diced
6-10 jalapeños, diced
40 sliced of cooked bacon, crumbled
60 eggs
4 cups of milk
3 lbs grated cheese
Prepare the above ingredients in the same manner as the recipe for a mere 4 burritos!
Because I was making such large quantities and because I am very concerned about food safety; I immediately cooled everything as I prepared it. Starting with the bacon, once it was crumbled I refrigerated it, same thing with the pepper mixture and the grated cheese. The last step was scrambling the eggs. I prepared half the scrambled eggs at a time. I cooled the cooked eggs in a metal bowl that I placed in an ice bath. After it had cooled, I added half of each of the bacon, pepper mixture and cheese. I then mixed this well, checked my seasoning and filled my tortillas. I wrapped each burrito in aluminum foil. As soon as I had a cookie sheet filled with a single layer of burritos, I placed them in the freezer. I then prepared the rest of the scrambled eggs and did it all again. Once the burritos were frozen, I placed them in labeled ziploc bags.
The frozen burritos can be reheated in the microwave. Check after one minute!
Frozen burritos can also be reheated in the oven:
Preheat oven to 350 degrees. Place frozen burritos in the oven for 20-30 minutes. If you want them toasted on the outside, remove the aluminum foil after 20 minutes and place them on a pan and return the burritos to the oven. Cook until the desired crispness is attained!
Update:
The breakfast burritos were a big hit with the fishermen! I guess I know what I will be making for their next fishing trip!
Recently, my sister had lots of company and prepared 20 breakfast burritos ahead of time and froze them. The morning she had to feed her guests , she reheated the burritos in the oven and the burritos were ready for each person as they woke up! She said it worked perfectly and everyone enjoyed their breakfast burritos!
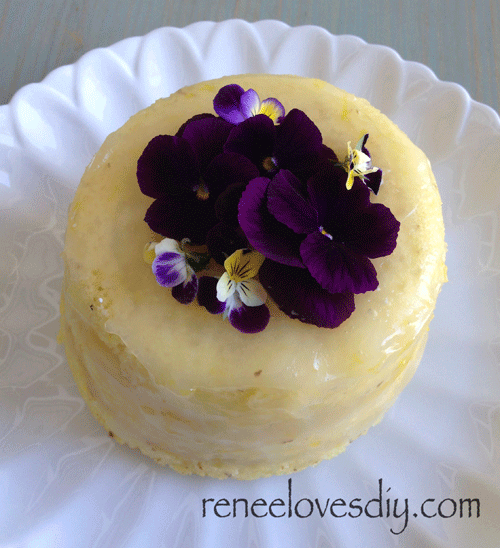
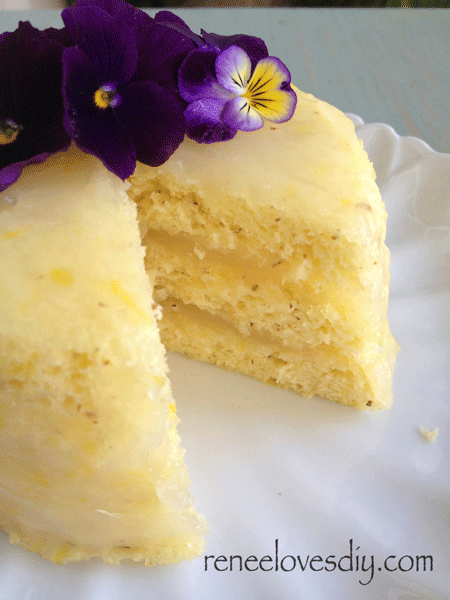
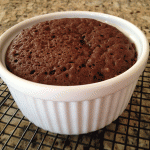
If you have been checking my latest posts, you would have found a delicious, easy to make and super quick chocolate ganache cake. Today’s post is that same cake in a tasty lemon version. The cake itself is made in the microwave and it is enough for 4 people to have the perfect size piece of cake or for one person to eat it all!
This cake is made, once again, from my favorite baking mix – Pamela’s Baking and Pancake Mix. This is such a versatile mix! I use it for pancakes, muffins, bread, cookies and cakes!
Here is the recipe so you can make your own!
Gluten-free Lemon Cake
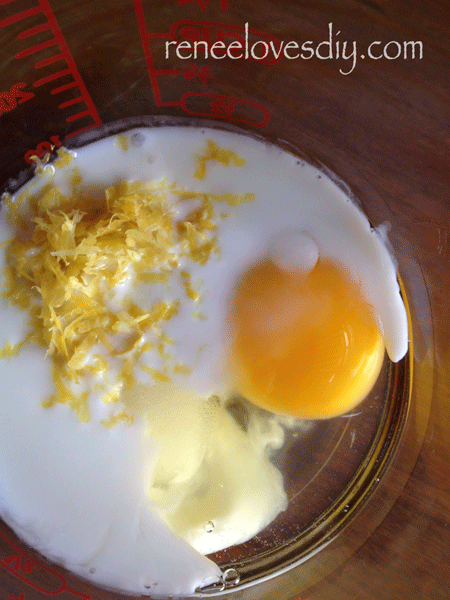
1 egg
1 tsp oil (I use coconut oil!)
3 tablespoons buttermilk
1 teaspoon lemon juice
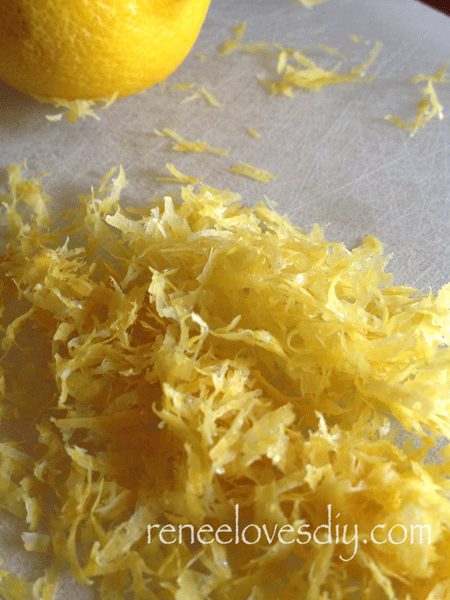
1/2 tsp lemon zest
1/4 teaspoon vanilla
1 &1/2 tablespoons of sugar
Mix the above ingredients until well blended.
Lemon ZestIngredients for a gluten-free lemon cake!
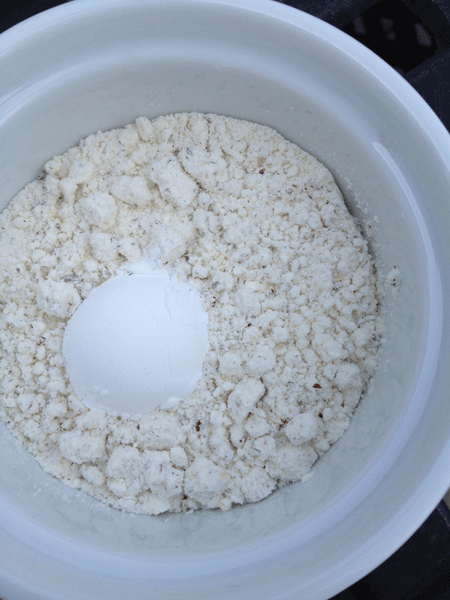
In a small bowl, mix the following dry ingredients:
1/3 cup Pamela’s Baking and Pancake Mix
1 teaspoon baking powder
Gluten-free lemon cake dry ingredients
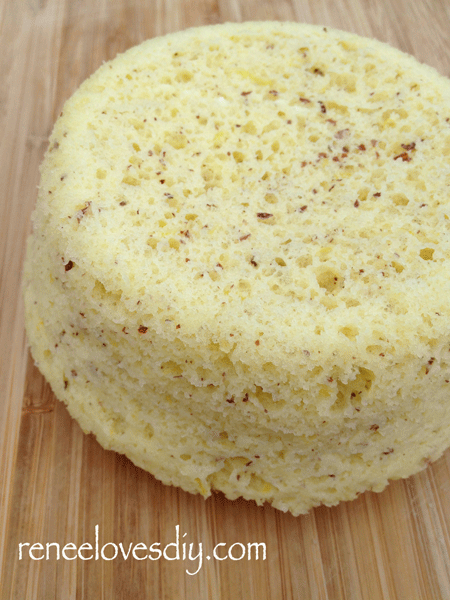
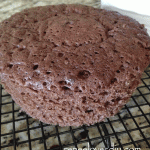
Blend the dry ingredients with the egg mixture and using a spatula, transfer the batter to a microwavable bowl. I used a 2 cup ramekin, which worked really well, since the sides are straight and that allowed me to easily slice the cake to create a layered cake! Place in the microwave for 2 minutes on high.
Remove the ramekin from the microwave. It will be very hot! Loosen the sides of the cake and turn it over onto a cooling rack. If it looks like the bottom of the cake is not quite done, just place it back in the ramekin and microwave a little longer! It sounds crazy, but it works!
Gluten-free Lemon Cake
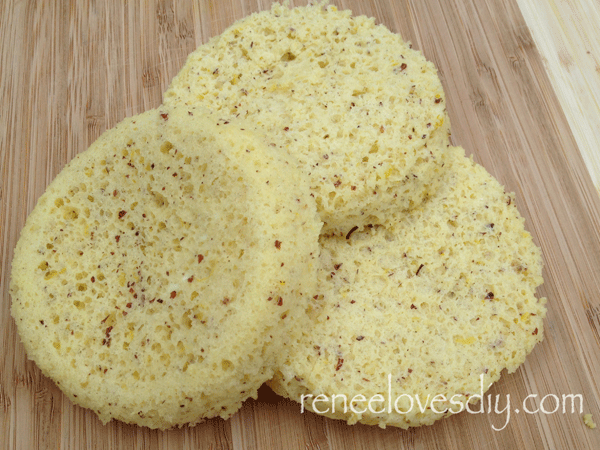
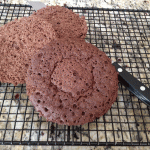
After the cake has cooled, slice it into three layers.
Slice the gluten-free lemon cake into thirds!
Now for the good stuff! I layered my cake with lemon filling that I prepared using the following recipe. If you don’t wish to take the time to make your own lemon filling, pick up a jar of lemon curd at the grocery store. The lemon curd from a jar is rather stiff therefore, I would warm it slightly in the microwave before using.
Lemon filling – this recipe comes from a Betty Crocker Cookbook my roommate gave me many years ago! On the front flap she left a message about using it when I am “feeling domestic”! As you can see from my blog, I have been feeling very domestic lately!
Clear Lemon Filling
3/4 cup sugar
3 tablespoons cornstarch
1/4 teaspoon salt
3/4 cup water
1 teaspoon lemon zest
1 tablespoon butter
1/3 cup lemon juice
Mix sugar, cornstarch and salt in saucepan. Slowly add the water and cook over medium heat; stir constantly until mixture thickens and boils. Let boil for 5 minutes, stirring constantly. Remove from heat, stir in lemon zest, butter and lemon juice. Let cool in the refrigerator.
After your lemon filling has cooled, spread it between your layers of cake. Stack the cake layers then cover the entire cake with the lemon filling. Enjoy!
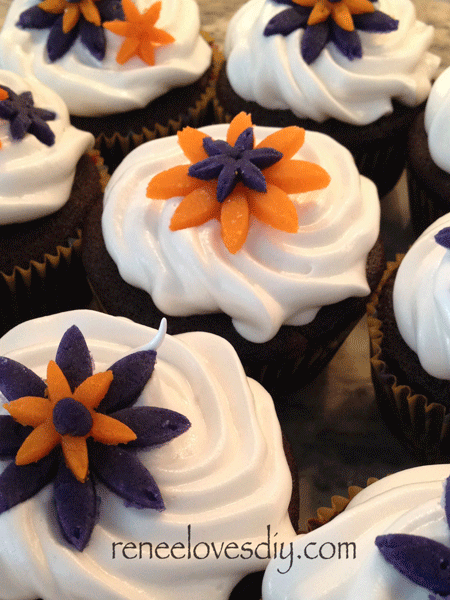
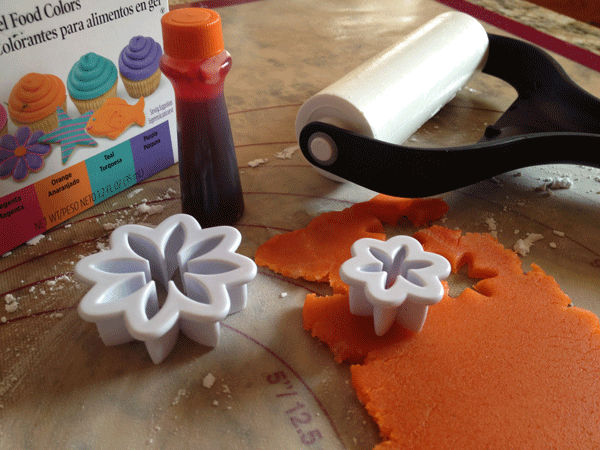
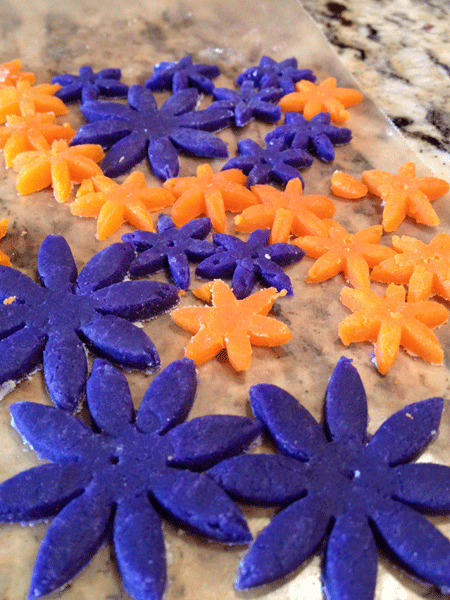
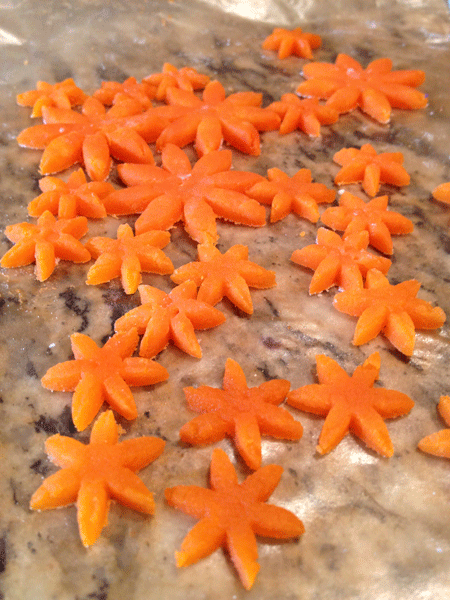
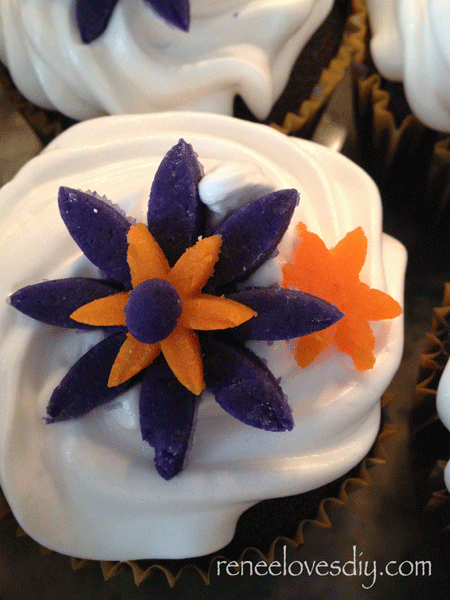
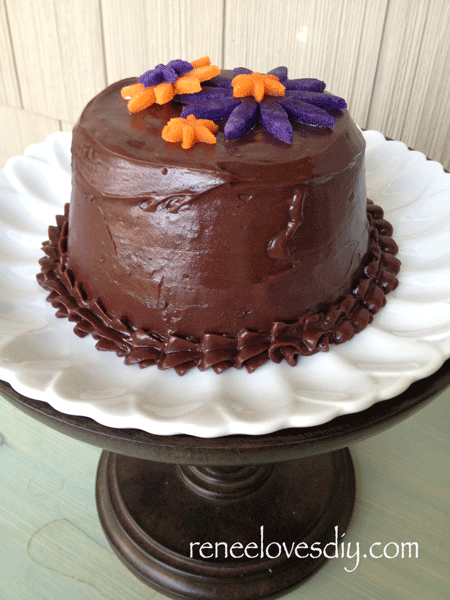
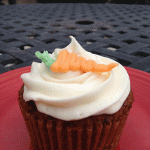
Here is another wonderful cupcake garnish! The flowers you see here are made from marzipan and are not only beautiful, but very tasty too!
Marzipan is made of finely ground almonds mixed with sugar to create a paste that can be molded into cake icing, wonderful candies, and cupcake garnishes! It is very delicious and can be found in any baking aisle!
Still not sure what marzipan is? Well, If you have ever been in a candy store, you have seen marzipan. The beautiful miniature fruit candies found in the display case are made from marzipan that has been colored and molded into beautiful shapes, such as apples, oranges, or bananas by a skilled candy maker. Next time you see them, try one. They are very tasty!
Creating this garnish was very easy. Here is the short list of what is required.
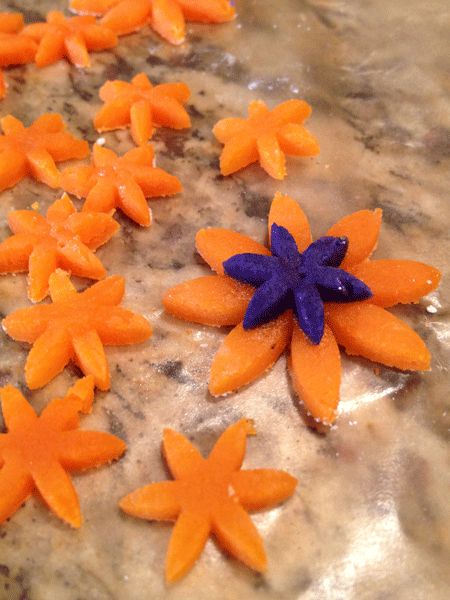
Fondant Cutters – mine are from Wilton and I found them at Michaels for less than $4. Marzipan – this comes in small cans or tubes in any baking aisle. Gel Food Colors – these now come in the multipack – love it!
Coloring the marzipan!
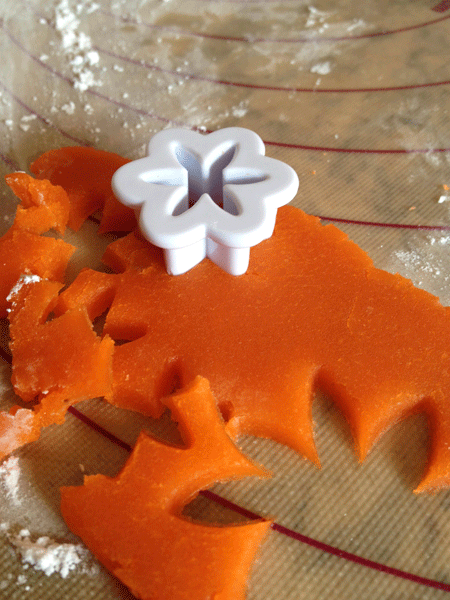
To color the marzipan: Break off the amount you think you will need; microwave for just a few seconds to warm it slightly; add a couple of drops of food coloring; knead the marzipan to incorporate the color. You may need to add a little water if it seems dry, a little powdered sugar if it seems too moist.
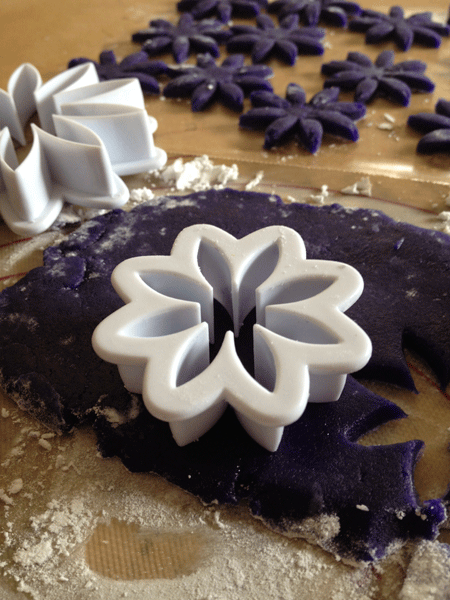
Rolling out the marzipan: Cover your surface with a light coating of powdered sugar; roll the marzipan to a thickness of about 1/4″. Using trial and error, decide what thickness works for your project.
Cutting the flowers: Using your fondant cutters, cut out the flowers for your decorations. The tricky part to this, is removing the flower from the cutter. Because the flowers are delicate, you will need to use toothpicks or bamboo sticks to remove them from the cutter. I used both the sharp and blunt ends of the picks to accomplish this.
The cupcakes you see here were for a wedding shower and because I needed to garnish 40 cupcakes, I made the flowers a couple of days before the event. I stored them on wax paper in an airtight container. The multi-colored flowers I stacked before storing them because the marzipan will dry some and it will be more difficult to get the pieces to stick together if they dry too much. You can always use a little corn syrup “glue” when stacking flowers. Not too much though or they will slide apart!
Last week, we had a family birthday to celebrate and I needed a small, gluten-free cake that I could make in an hour without using the oven. It was 90 plus degrees out and turning on an oven was the last thing I wanted to do. Amazingly enough, after a quick internet search, I was able to make it happen!
Coming to my rescue was none other than my favorite baking mix – Pamela’s Baking and Pancake Mix . I have said it before and I’ll say it again – I love this mix. I use it for pancakes, muffins, cookies and now cake!
On Pamela’s website, I found a recipe for bread that was prepared in the microwave! I tried the recipe and it worked fabulously! I was shocked, excited, and absolutely thrilled. I knew if I could make bread in the microwave, I could make cake.
Using the Amazing Bread in about a Minute recipe as a starting point, I added a few additional ingredients and created a recipe for the beautiful cake you see before you!
Chocolate Ganache Gluten-free Cake
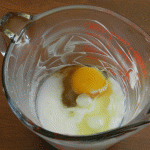
1 egg
1 tsp oil (I use coconut oil!)
3 tablespoons buttermilk
1 teaspoon water
1/4 teaspoon vanilla
1 &1/2 tablespoons of sugar
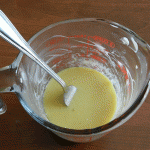
Using a fork, mix the above ingredients until well blended.
Gluten-free Cake
Gluten-free Microwave Cake
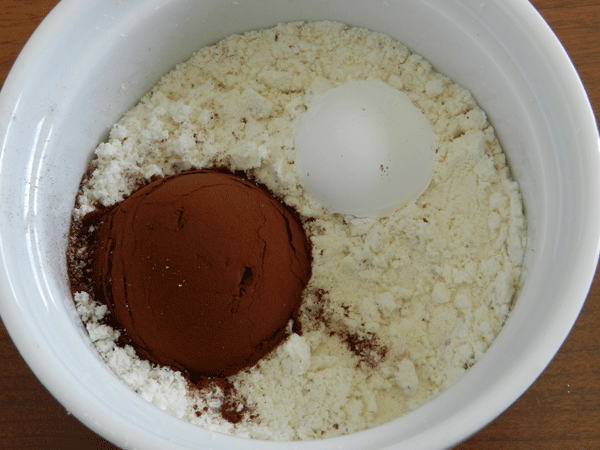
In a small bowl mix, the following dry ingredients:
1/3 cup Pamela’s Baking and Pancake Mix
1 teaspoon baking powder
1 tablespoon cocoa powder
Dry Ingredients
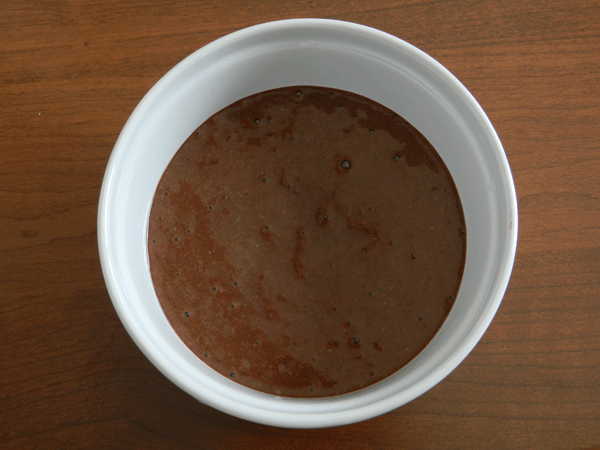
Blend the dry ingredients with the egg mixture and using a spatula transfer the batter to a microwavable bowl. I used a 2 cup ramekin, which worked really well, since the sides are straight and that allowed me to easily slice the cake to create a layered cake! Place in the microwave for 2 minutes on high.
Pour cake batter into microwaveable dish
Remove the ramekin from the microwave. It will be very hot! Loosen the sides of the cake and turn it over onto a cooling rack. If it looks like the bottom of the cake is not quite done, just place it back in the ramekin and microwave a little longer! It sounds crazy, but it works!
Gluten-free Chocolate Cake
Gluten-free Microwave Chocolate Cake
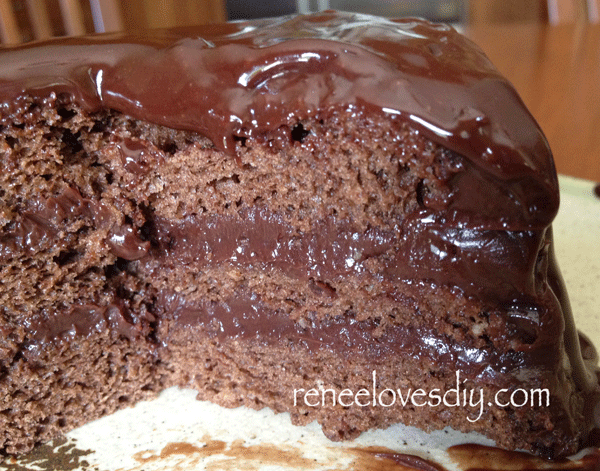
After the cake has cooled, slice it into three layers.
Gluten-free Microwave Chocolate Cake
Slice cake into three layers
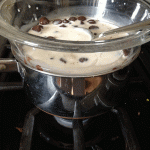
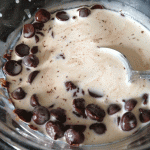
Prepare the ganache. Heat one cup of cream and 1 1/2 cups of chocolate chips in a double boiler over simmering water. Allow the cream & chocolate chips to gently heat then stir until smooth. Remove from heat, stir in 1/2 tsp vanilla and allow the ganache to cool.
To create an extra glossy ganache add 1 tablespoon of corn syrup with the vanilla.
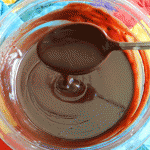
Chocolate Ganache
Chocolate Ganache
Chocolate Ganache
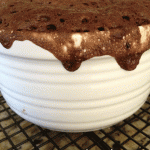
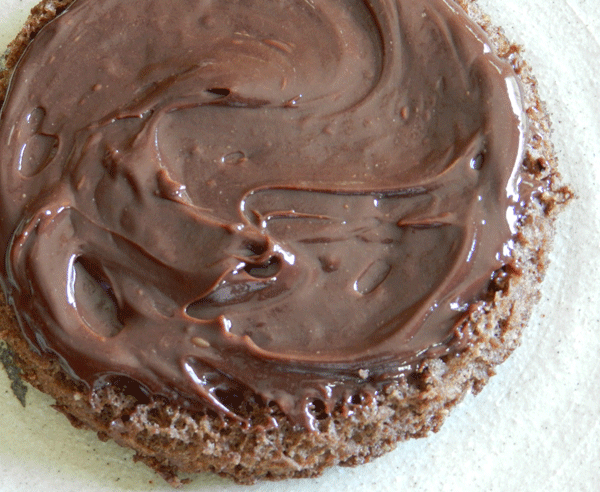
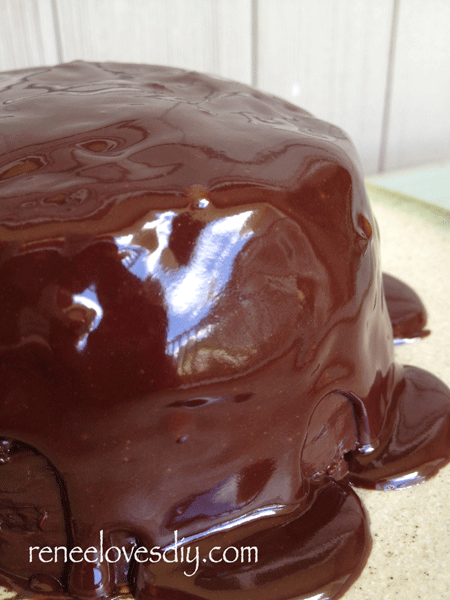
Spread the ganache between the cake layers, stacking them on top of each other.
Create a layer cake with ganache!
Cover the entire cake with the ganache. To create the dripping chocolate, heat ganache slightly so it pours easily!
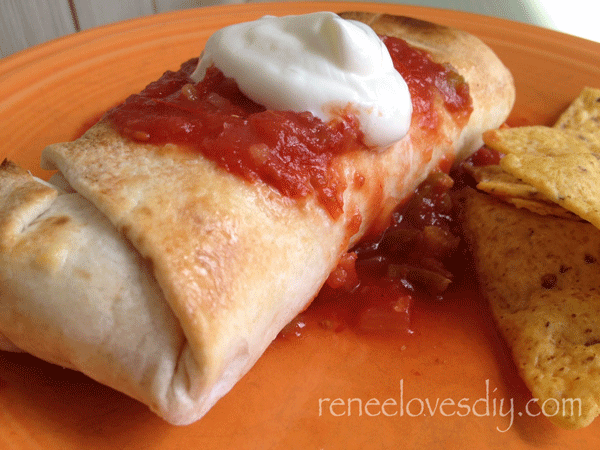
Baked Chicken Chimichangas – we love chimichangas! The deep fried ones with the crispy crust are really wonderful, but I feel so guilty eating all that deep fried tortilla. Plus, drowning that delectable crispness in salsa and sour cream just makes the tortilla soggy anyway…right?…So it’s not that great…right? Ok that is what I am telling myself – so let’s just go with it – baked is better!
My son loves it when I make chimichangas because that means there is a quick meal for him in the freezer for at least a week. They never last long at my house – they are that good!
This recipe will make 10- 12 chimichangas, depending on how full you fill them!
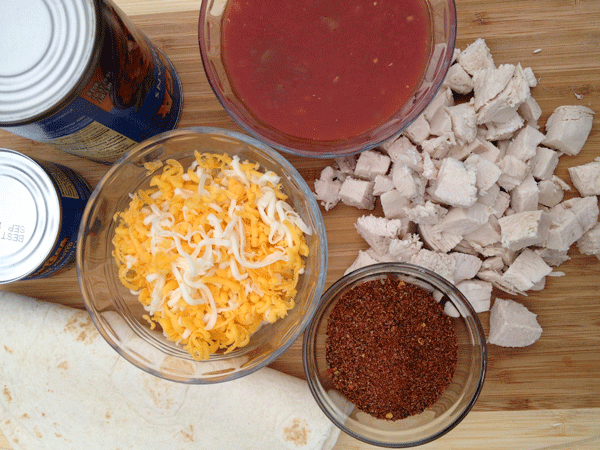
Chimichanga Ingredients
1.5 lbs cooked and cubed chicken breast
1 tbs taco seasoning
2 cups salsa
3/4 lb freshly grated cheese ( I use a mixture of cheddar and jack cheeses)
1 can roasted diced green chiles
1 can refried beans
10-12 10″ tortillas
In a large bowl flavor the chicken with the taco seasoning and mix well. Add the rest of the ingredients and mix until uniform. Place approximately 3/4 cup of the chicken mixture in the center of your tortilla. Starting at one end roll the tortilla over the mixture, fold in the sides and then finish rolling it up. If the tortillas crack upon rolling, heat the tortilla slightly on a griddle before using them.
Chimichanga Filling
Baked Chicken Chimichanga
Baked Chicken Chimichanga
Now you have options!
Hungry now – Heat oven to 350 degrees. Wrap each chimichanga in aluminum foil, place on a cookie sheet and bake 20 minutes. Remove from the oven, unwrap the chimichanga and bake an additional 10-15 minutes to crisp the outside!
Hungry later – place chimichangas on a cookie sheet, keeping them separate. Place the chimichangas in the freezer for at least 30 minutes. Remove from the freezer and place your chimichangas in freezer ziplock bags. Because you have taken the time to freeze the tortilla, they will not stick together in the bag. The other option is to wrap each one in aluminum foil then immediately freeze.
Baked Chicken Chimichanga
Chimichangas ready for the freezer!
To prepare frozen chimichangas, remove from freezer, microwave on high for 1-2 minutes. If you want the outside crispy, toast the chimichanga in an oven for 10 minutes at 350 degrees. My toaster oven works well for this!
Baked Chicken Chimichanga
Helpful tips: Taco Seasoning – I make my own! It is so much better than the packets I used to purchase before I knew better. I use the recipe from allrecipes.com!
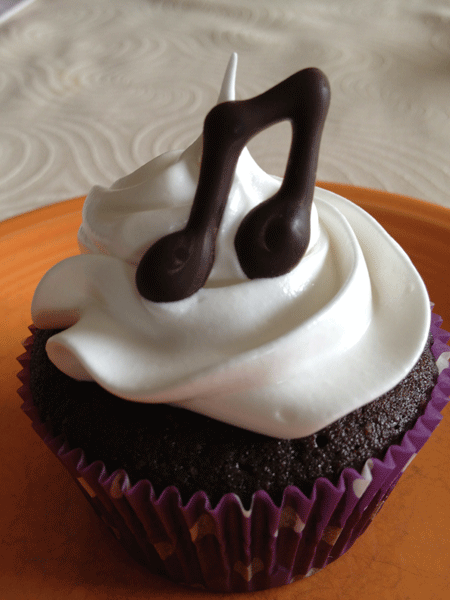
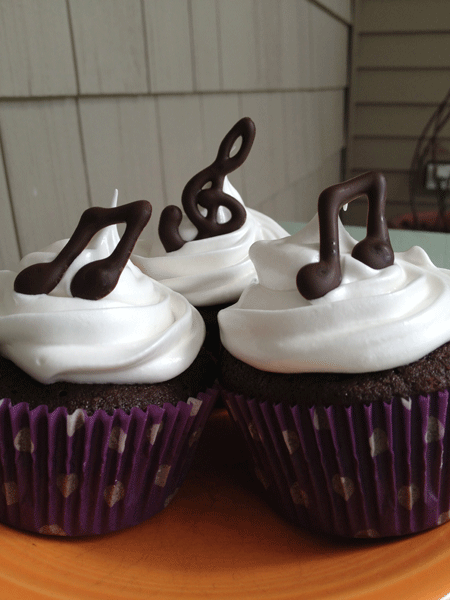
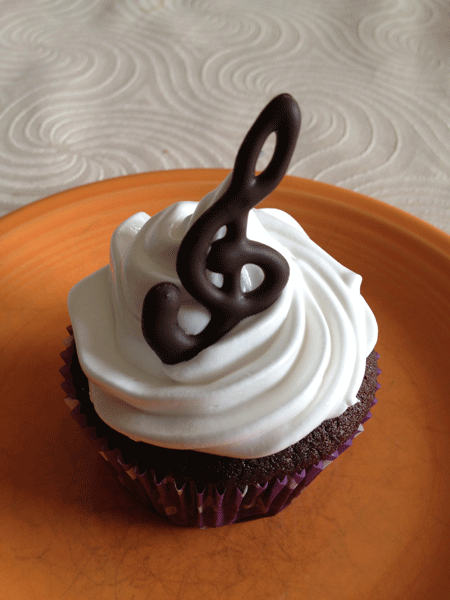
Musical chocolate garnishes for one of my favorite cupcakes!
We were attending a jazz event for my son’s school and I needed to donate a dessert!
What could be better than fabulous cupcakes decorated with a musically themed garnish!
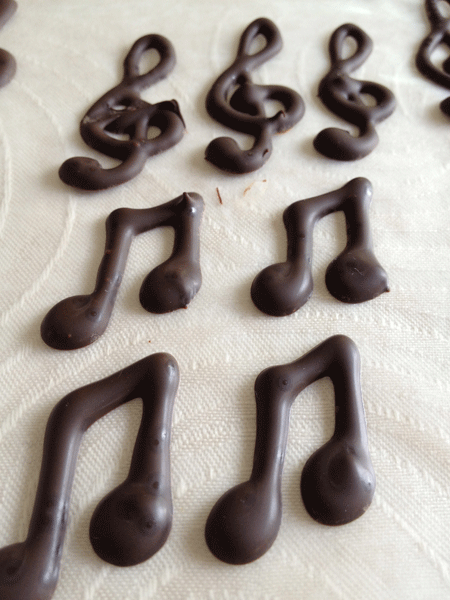
Drawing for chocolate garnishMusical Notes Chocolate Garnish for Cupcakes
Draw the shape you would like to create out of chocolate. Place a piece of wax paper over the drawing and pipe melted chocolate, using a pastry bag and small round tip, over your drawing. When finished, slide the wax paper exposing the drawing again to create multiple garnishes!
Chocolate Garnish for CupcakesTreble Clef Chocolate Garnish for Cupcakes
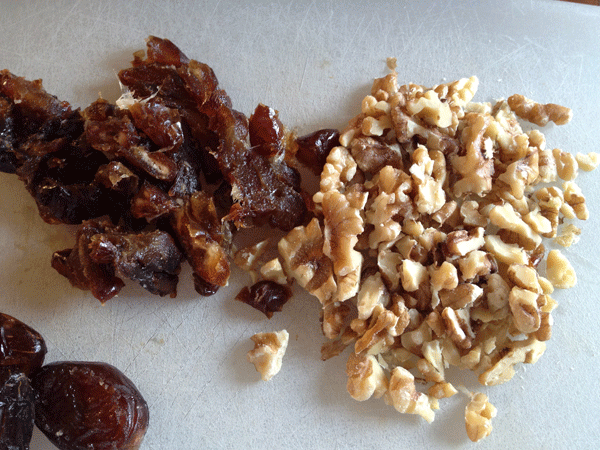
Dates and walnuts make a wonderful combination. Mix them into pancake batter and you have a nutritious, hearty and delicious breakfast!
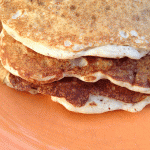
I asked my son to provide me with a description of my pancakes and he said “they are life changing!” Ok, perhaps he was being a bit dramatic. Life changing – maybe not, but they are flavorful!
Adding the sweet, dark brown dates to pancakes provides a delightful caramel-like flavor and the walnuts are crunchy, delicious and good for you. Check this link to learn more about the benefits of eating walnuts!
In my house, I like to mix it up and go gluten-free, meat-free….. In fact, morning breakfasts for my son are always gluten-free. After he began suffering from terrible mid-morning headaches at school, I began recording his breakfast diet. Low and behold, every time he ate wheat for breakfast, his headaches would occur. Because I was already using a fabulous gluten-free baking mix, it was easy to convert him to all gluten-free breakfasts with great success! No more headaches!
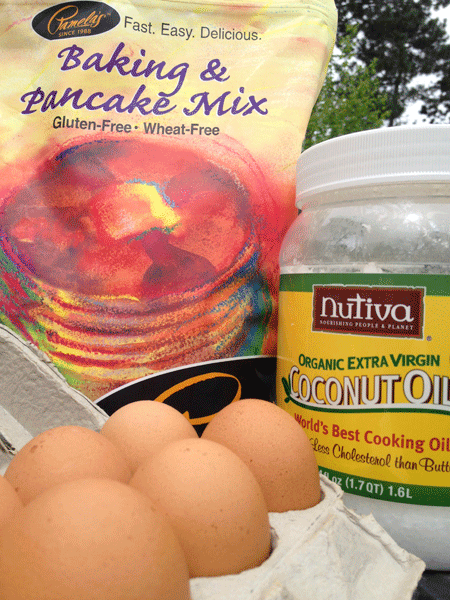
Essential Breakfast Items
The mix I use and have been using for years is Pamela’s Baking and Pancake Mix. I use it for pancakes, muffins, crepes, and cookies. The flavor and texture is fabulous. With the exception of cookies, I think it would be difficult for most people to tell the difference between wheat flour and this mix. The cookies I find to be a little gritty, but still delicious! With the other baked items, there is no grittiness and they are wonderful!
On Pamela’s link you will find a list of great products along with recipes. Below, I give my recipe for Date & Walnut Pancakes using this mix.
Dates & Walnuts
Date & Walnut Pancakes
2 eggs
2 Tbls melted Coconut Oil
1 tsp Vanilla
1 cup Buttermilk
1 cup Pamela’s Baking & Pancake Mix
1/2 cup chopped dates
1/2 cup chopped walnuts.
Mix the first 4 ingredients well, add the baking mix and stir until combined. Add the dates and walnuts to the batter, mix until combined. Pour batter onto a greased griddle and cooked until done, flipping once.
Enjoy!
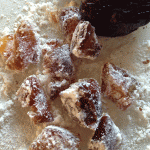
Tips – tossing a small amount of pancake mix over the dates while chopping them will assist in keeping the pieces separate! Try using the buttermilk! The batter remains thicker than it would with milk or water, but it is delicious! Even my kids commented on the enhanced flavor of the pancakes when I began using buttermilk!
Dates coated with pancake mix to prevent sticking.
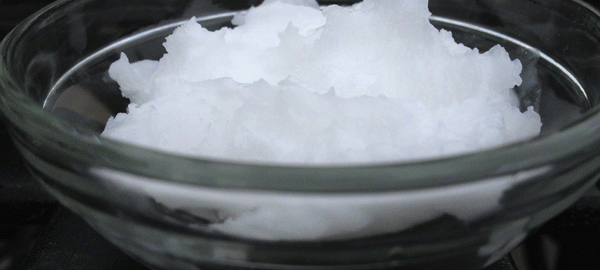
Coconut Oil…Coconut Oil…I Love Coconut Oil!
Why? Because it turns out that coconut oil is good for you. Who knew?
If you don’t believe me, check out what Doctor Oz has to say about the benefits of coconut oil!
For my use, I slather it on my skin, use it in lots of recipes and occasionally swish it in my mouth! If you have been reading my latest posts, you know I am a fan of coconut oil.
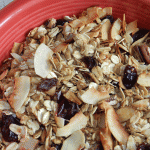
I use it to make popcorn, most baked goods, granola and even to smooth out chocolate. For those of you worried it will have a strong flavor, it actually does not. It smells great and the small amount of coconut flavor is very pleasant.
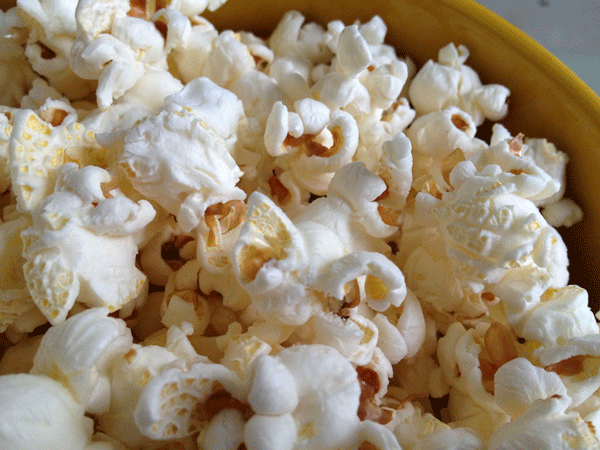
Popcorn
Popcorn: I make popcorn the way Alton Brown suggests – Check out his Perfect Popcorn Recipe! He uses peanut oil, which I am sure is wonderful, but because we have a peanut allergy in the family, we treat anything associated with peanuts like the plague. We substitute coconut oil and it works fabulously!
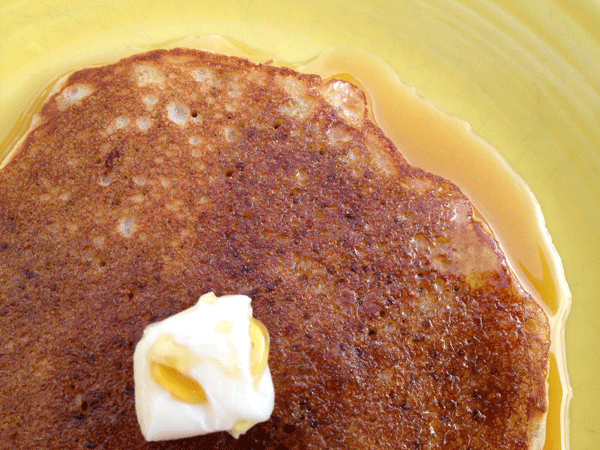
Pancakes
Baking: For baking, it is so easy to use. Melt the coconut oil and use it wherever oil is indicated. I use it in my recipes for muffins, pancakes, waffles, cupcakes, granola….
Moisturizer: I slather it on as a moisturizer because it is great for my skin. I use it every night because I hate putting chemicals on my face! Also, I use organic; no need to absorb any extra toxins. We have plenty of those in our environment already. You will find it is a bit greasy, so you need to give it time to absorb, but oh my skin is so soft!
Oil Pulling: Lastly, I swish it in my mouth – it’s called Oil Pulling and my sister introduced this to me years ago. Here is a link on Oil Pulling that will explain it better than I can! Historically, oil pulling was performed using sesame or sunflower oil, but because of coconut oil’s anti-microbial properties (I know – can this stuff get any better!) it can also be used. The swishing is supposed to happen for 20 minutes and honestly, I struggle with performing it for that long. Pulling is said to have many health benefits, one of which is whitening your teeth – with no toxins – gotta love it!