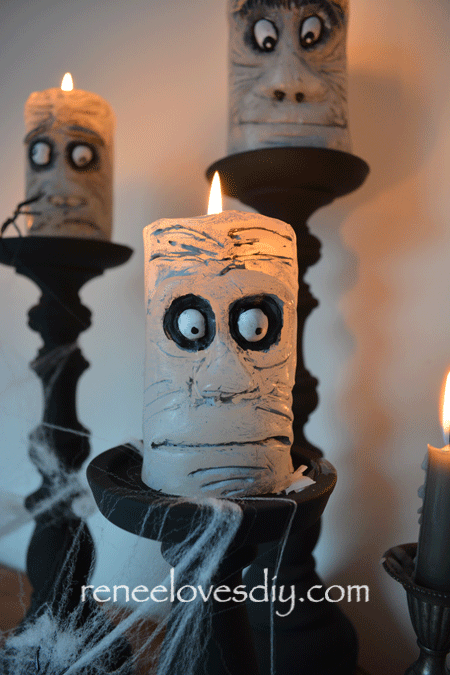
Recently on Pinterest, I found a picture of some adorable Halloween candle sculptures! The sculptures were fabulous, but I was disappointed by the fact that they could not be used as candles! For Halloween there is nothing better than the ominous glow of candle light! Lots of candle light!!
The wonderful thing about Pinterest is the inspiration it provides and that’s exactly what happened! Seeing the adorable Halloween candle sculptures on Pinterest inspired me to create my own Halloween candles!
This post is about molding candles into eerie faces, with eyes that ooze out of their sockets as the candles melt!
Now that’s a Halloween candle!
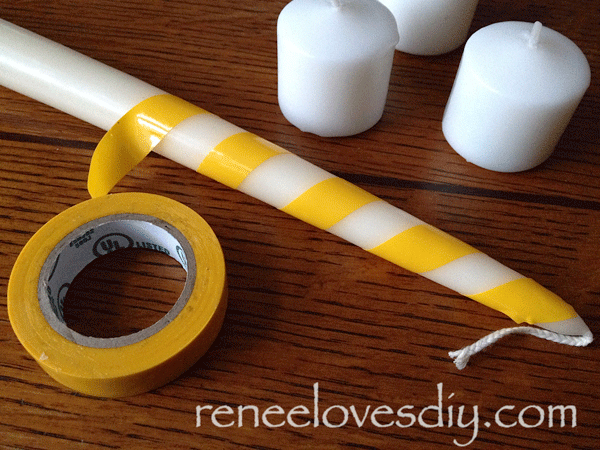
First things first – What kind of candles?
After much trial and error, I discovered that the candles with a rough texture on the surface work the best. Why? The wax is consistent throughout the entire candle.
In the picture below, you can see the two rough candles to the right and the smooth candle on the left. Do not use the candles with the smooth outer layer. The wax beneath this smooth layer is different and crumbles as you sculpt.
Also, as much as I hate to say it, beeswax candles are very difficult to use for this project. The wax is just too hard. Save those candles for all the other holidays!

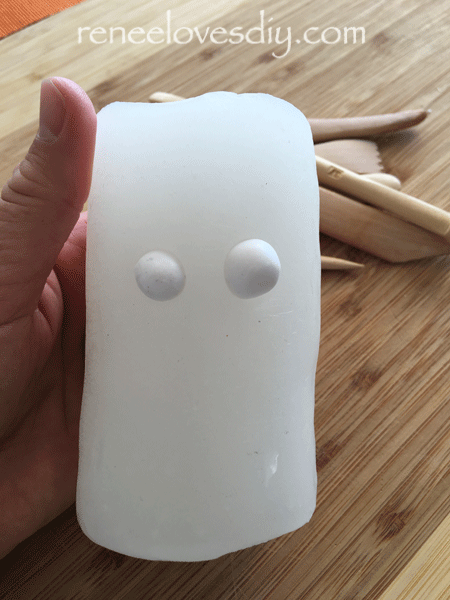
On to the eyeballs! I used FIMO clay. I formed different sized and shaped eyeballs, baked them for the appropriate length of time and viola – eyeballs!
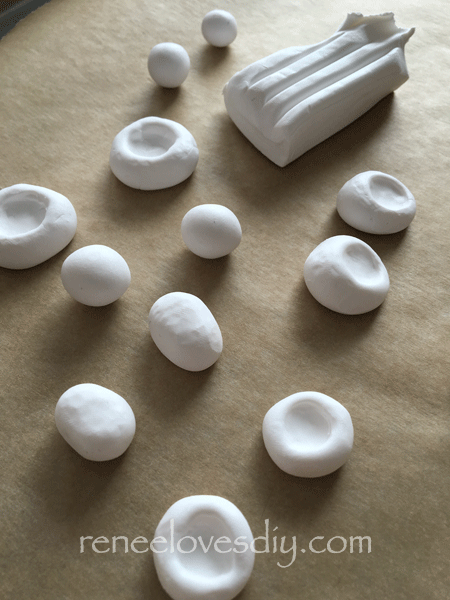
Some of the eyes I painted ahead of time and others I painted later, after inserting them into the candle! It’s totally up to you!

Softening the candle!
I found the best way to do this was to put the candle in the sun and create a greenhouse effect by covering the candle with glass. The candle will become warm and soft enough to be molded into a face.
When working with wax you must always be careful because it is flammable and can be dangerous! I found the candles, when heated this way, became quite warm and did begin to melt so you must watch them because you do not want a puddle!
Bottom line – always be careful with wax!

Now on to the molding of the face!
Once the candle is soft, push in a couple of eyeballs and start molding. I have wooden carving tools shown below that I use, but it’s not necessary. Kitchen utensils will work too!
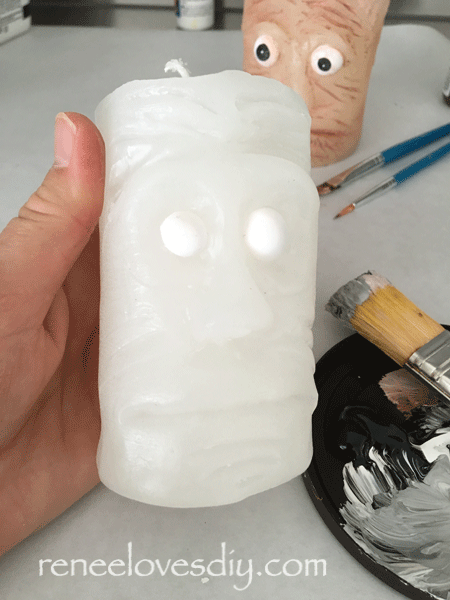
Using your hands and tools, mold a face onto the candle. Along with eyebrows, nose and mouth, I like to add lots of wrinkles!
Here is a short video showing the molding and painting process!
[embedyt] http://www.youtube.com/watch?v=YD2_nGgSDTE[/embedyt]
One more thing, while the candle is still soft, press the bottom flat against your working surface to be sure the candle stands straight. We don’t want any tippy candles!
On to the painting!
As you can see in the above picture, it is difficult to see all the features of the candles face. By adding color in the right places on the wrinkles, nose, eyes… all those features will pop!
Below you can see that I covered the candle with paint to fill in all the wrinkles and features I added in the molding process. Once I have all the crevices filled, I removed most of the paint with paper towels. That way all that is left are the accents in all the right places!
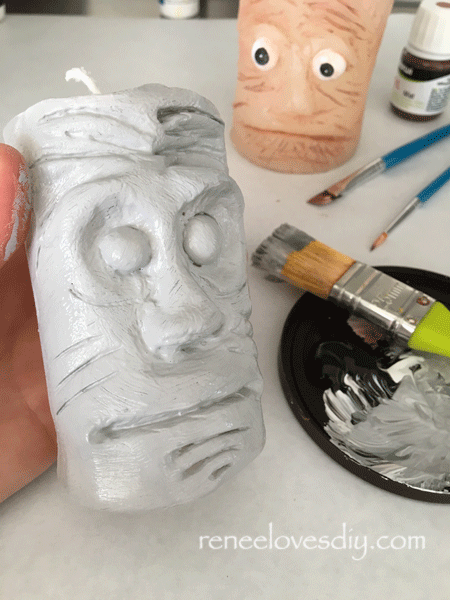
To lengthen the drying time of your paint, which will make it easier to remove the excess paint from your candle, I mixed in an acrylic medium. You will find it right along side the acrylic paint and it is translucent white. This is useful stuff to always have on hand!
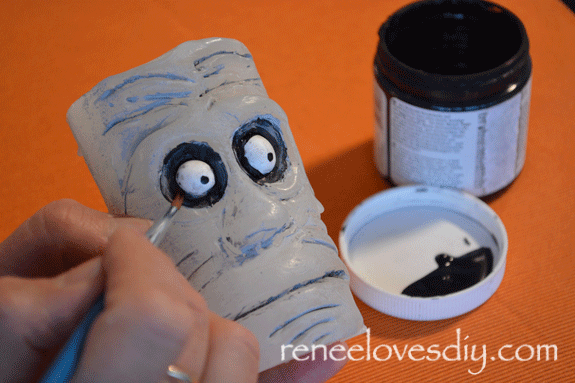
A few finishing touches around the eyes and the candle is ready for Halloween!
What a fun way to create the ominous glow of candle light for Halloween this year!