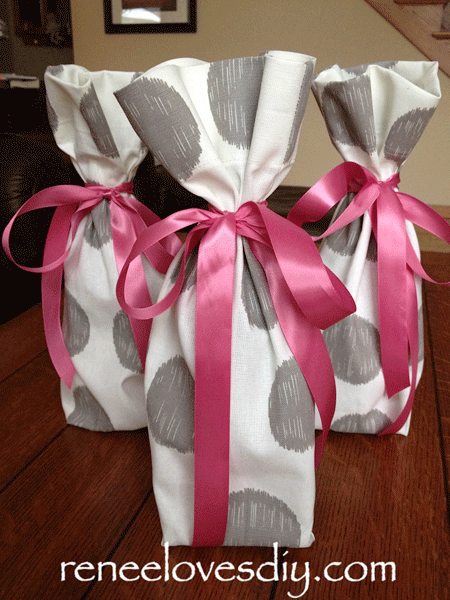
If you enjoy a wonderful glass of wine then you are probably like me and delight in giving your favorite bottles as gifts! Since we all like our gifts to be beautifully wrapped, what better way to present a bottle of wine than to wrap it in a lovely wine bag! This post also includes free printable wine gift tags!
Wine bottle gift bags are incredibly easy to make and for those of you who claim to be “non-sewers” this is the perfect project for you to begin your sewing adventure!
What do you need!
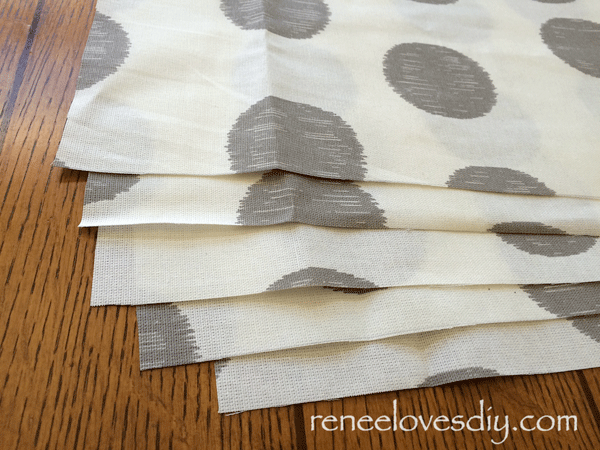
1 yard of a medium weight woven fabric – Decorator fabrics are my fabric of choice!
One yard will make 5 wine bags!
Courage! Yes – You can do this!
Here is a how-to video for making wine bags! This is the easiest way to learn how to create this fun and easy project!
Step One – Lay out your 1 yard of fabric and cut 8.5″ strips lengthwise. If your fabric is at least 44″ wide, you will be able to cut 5 strips of fabric that are 8.5″ wide and 36″ long from one yard of fabric.
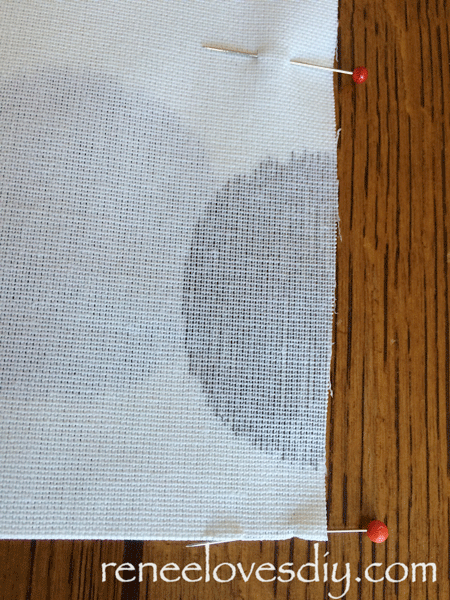
Step Two – Taking one of your strips of fabric, fold it in half with the right sides together.
In sewing terms : Right side = printed side.
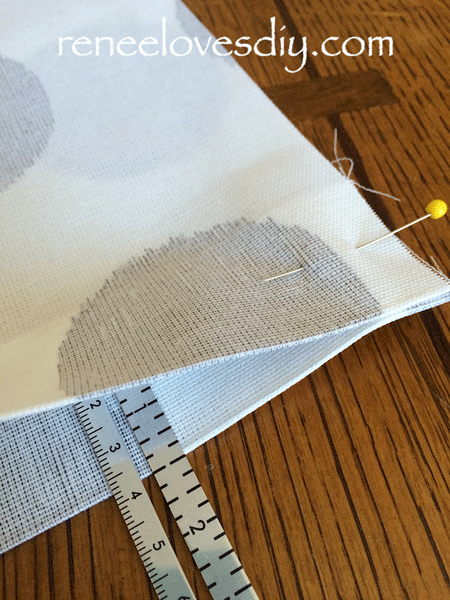
Pin along the long edges and mark the bottom fold with a pin.
Now we are going to create a pleat at the bottom fold to create a nice “boxed” bottom to our bag.
Step Three – Using your bottom fold pin as a marker, measure 1.5″ and create a new bottom fold. Remove the pin that originally marked the bottom and replace it in the same spot catching both layers of fabric. Do this on both sides of the bottom fold.
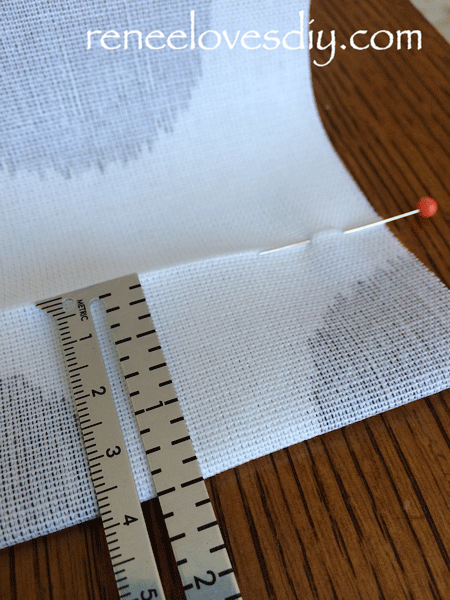
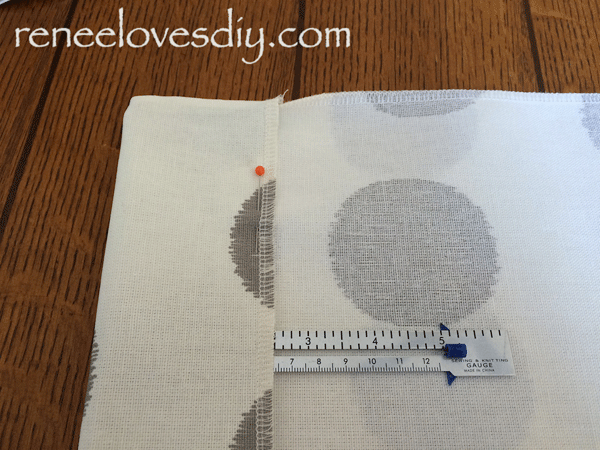
Now you will notice extra fabric on your top layer, just flatten this out and you will see how easily the pleat is formed at the bottom fold. Remove the bottom fold pin again and re-pin it so it now goes through all 4 layers of fabric.
On the other side, do the same thing – Remove the bottom fold pin and re-pin it so it goes through all 4 layers of fabric.

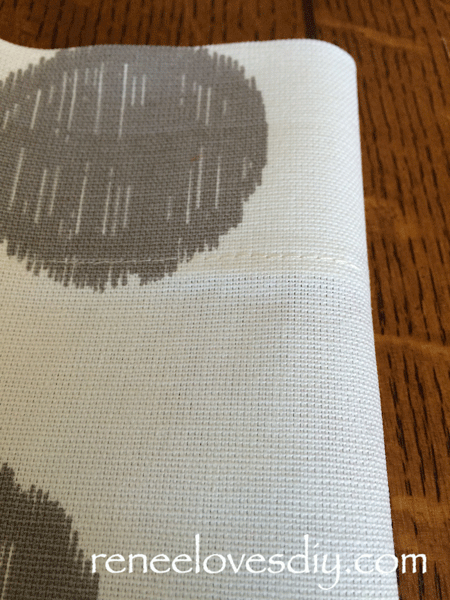
Step Four – You are now ready to sew your bag! Stitch 5/8″ seam on each of the long ends making sure to use a few back stitches at the start and end of your seams so your stitching will not unravel. At the top opening, finish the fabric edge with a zig-zag stitch to prevent it from fraying.
I am fortunate enough to have a serger therefore, I used that to sew my seams and finish the top edge of my bag. This is not necessary!
Time to create a hem at the bag opening.
Step Five – Fold the top opening of your bag over 2.5″ and pin it in place. Stitch the fold in place using a straight stitch 3/8″ from the edge.
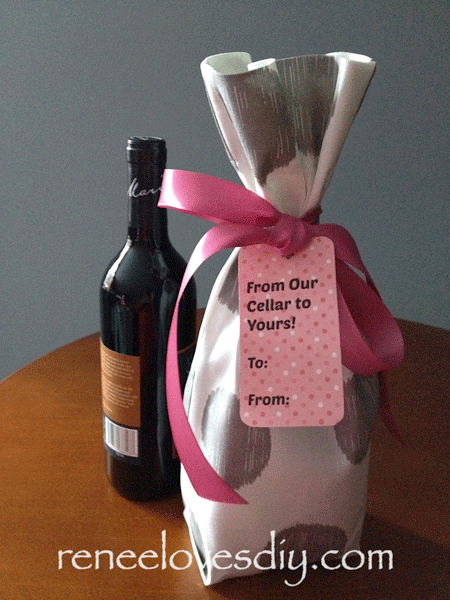
Turn your bag right side out and Voila! – A Beautiful Wine Bag!
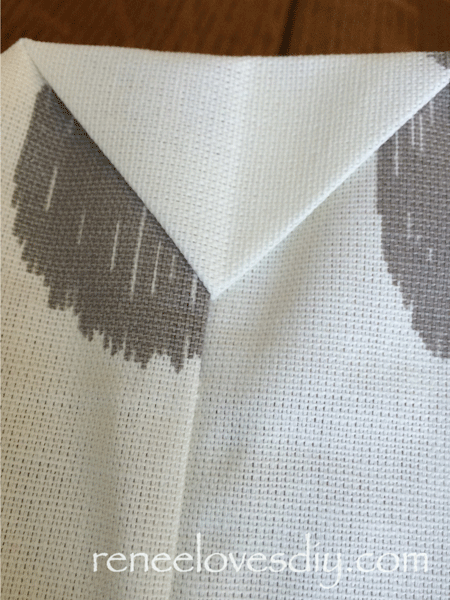
I do iron the bottom box pleat on the bags. It is not necessary, but it does finish it off nicely!

Now go take an adventure to your local fabric store and find a beautiful fabric to create these wonderful bags! Don’t forget the ribbon to tie your bag with!
A ribbon with a bow will require 42″ of ribbon and a ribbon with just a knot needs only 24″.
For additional fun, include an adorable wine tag with your gift – they are free!
Click here to print – Wine Tags!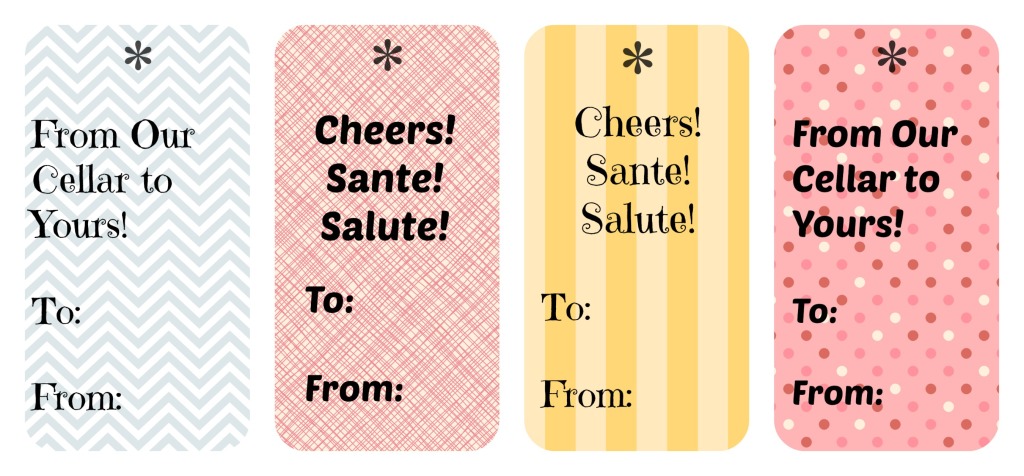
Great idea! Salut!
Thanks Brigid!
Next time I see you, I will bring you a beautifully wrapped bottle of wine!