I think spring is my favorite time of the year!
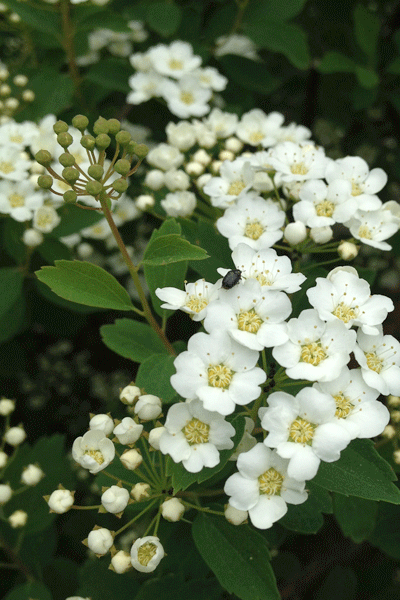
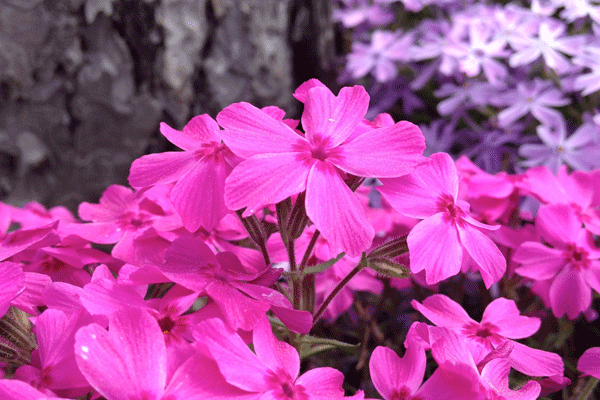
I think spring is my favorite time of the year!

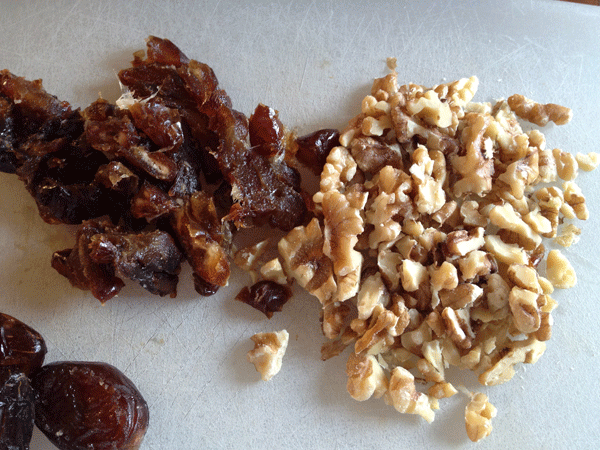
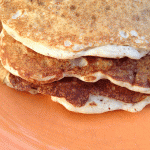
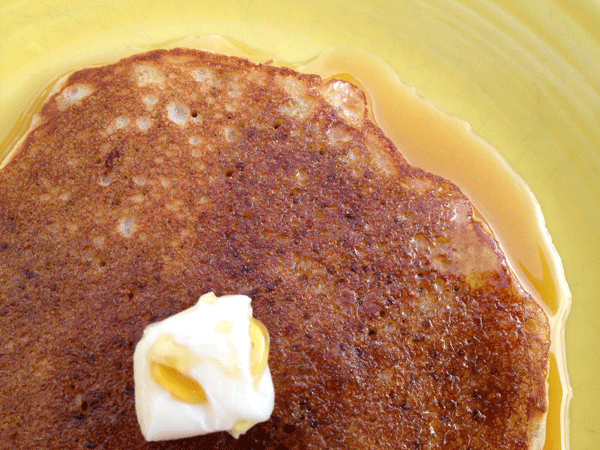
Dates and walnuts make a wonderful combination. Mix them into pancake batter and you have a nutritious, hearty and delicious breakfast!
I asked my son to provide me with a description of my pancakes and he said “they are life changing!” Ok, perhaps he was being a bit dramatic. Life changing – maybe not, but they are flavorful!
Adding the sweet, dark brown dates to pancakes provides a delightful caramel-like flavor and the walnuts are crunchy, delicious and good for you. Check this link to learn more about the benefits of eating walnuts!
In my house, I like to mix it up and go gluten-free, meat-free….. In fact, morning breakfasts for my son are always gluten-free. After he began suffering from terrible mid-morning headaches at school, I began recording his breakfast diet. Low and behold, every time he ate wheat for breakfast, his headaches would occur. Because I was already using a fabulous gluten-free baking mix, it was easy to convert him to all gluten-free breakfasts with great success! No more headaches!
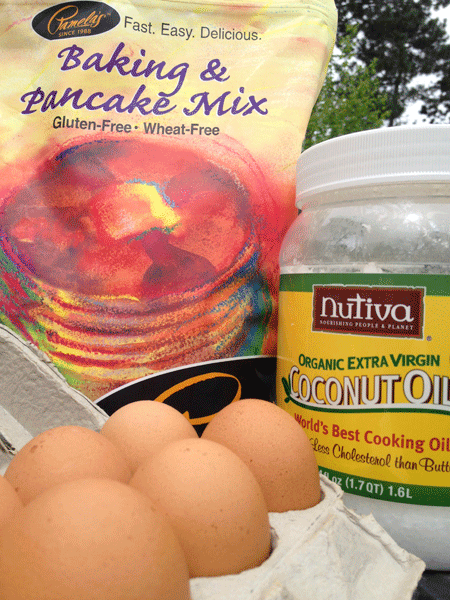
The mix I use and have been using for years is Pamela’s Baking and Pancake Mix. I use it for pancakes, muffins, crepes, and cookies. The flavor and texture is fabulous. With the exception of cookies, I think it would be difficult for most people to tell the difference between wheat flour and this mix. The cookies I find to be a little gritty, but still delicious! With the other baked items, there is no grittiness and they are wonderful!
On Pamela’s link you will find a list of great products along with recipes. Below, I give my recipe for Date & Walnut Pancakes using this mix.
2 eggs
2 Tbls melted Coconut Oil
1 tsp Vanilla
1 cup Buttermilk
1 cup Pamela’s Baking & Pancake Mix
1/2 cup chopped dates
1/2 cup chopped walnuts.
Mix the first 4 ingredients well, add the baking mix and stir until combined. Add the dates and walnuts to the batter, mix until combined. Pour batter onto a greased griddle and cooked until done, flipping once.
Enjoy!
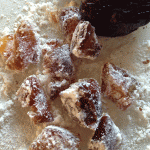
Tips – tossing a small amount of pancake mix over the dates while chopping them will assist in keeping the pieces separate! Try using the buttermilk! The batter remains thicker than it would with milk or water, but it is delicious! Even my kids commented on the enhanced flavor of the pancakes when I began using buttermilk!

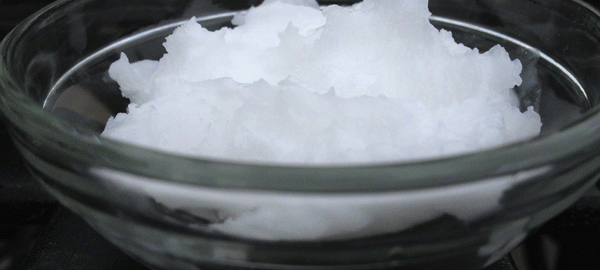
Coconut Oil…Coconut Oil…I Love Coconut Oil!
Why? Because it turns out that coconut oil is good for you. Who knew?
If you don’t believe me, check out what Doctor Oz has to say about the
benefits of coconut oil!
For my use, I slather it on my skin, use it in lots of recipes and occasionally swish it in my mouth! If you have been reading my latest posts, you know I am a fan of coconut oil.
I use it to make popcorn, most baked goods, granola and even to smooth out chocolate. For those of you worried it will have a strong flavor, it actually does not. It smells great and the small amount of coconut flavor is very pleasant.
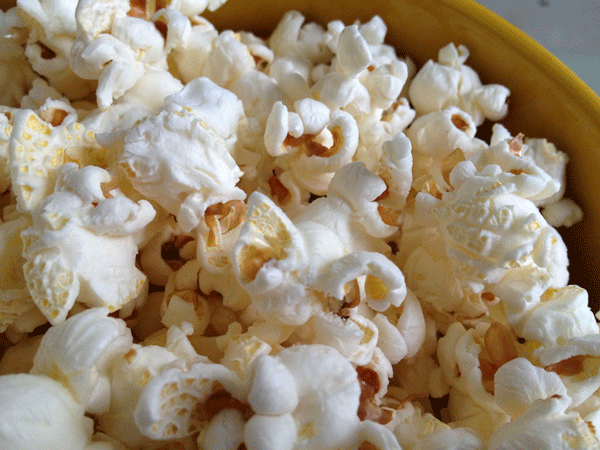
Popcorn: I make popcorn the way Alton Brown suggests – Check out his Perfect Popcorn Recipe! He uses peanut oil, which I am sure is wonderful, but because we have a peanut allergy in the family, we treat anything associated with peanuts like the plague. We substitute coconut oil and it works fabulously!
Baking: For baking, it is so easy to use. Melt the coconut oil and use it wherever oil is indicated. I use it in my recipes for muffins, pancakes, waffles, cupcakes, granola….
Moisturizer: I slather it on as a moisturizer because it is great for my skin. I use it every night because I hate putting chemicals on my face! Also, I use organic; no need to absorb any extra toxins. We have plenty of those in our environment already. You will find it is a bit greasy, so you need to give it time to absorb, but oh my skin is so soft!
Oil Pulling: Lastly, I swish it in my mouth – it’s called Oil Pulling and my sister introduced this to me years ago. Here is a link on Oil Pulling that will explain it better than I can! Historically, oil pulling was performed using sesame or sunflower oil, but because of coconut oil’s anti-microbial properties (I know – can this stuff get any better!) it can also be used. The swishing is supposed to happen for 20 minutes and honestly, I struggle with performing it for that long. Pulling is said to have many health benefits, one of which is whitening your teeth – with no toxins – gotta love it!
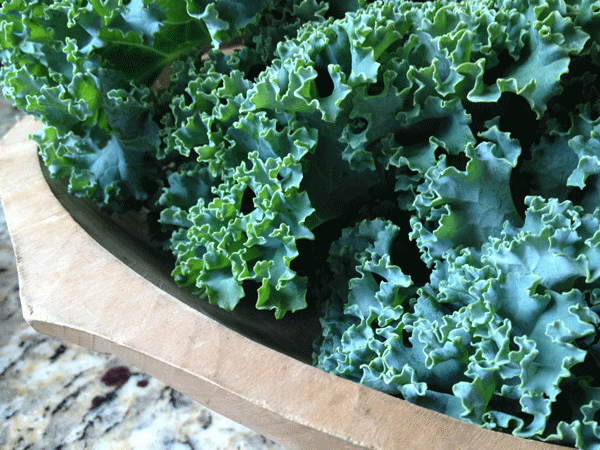
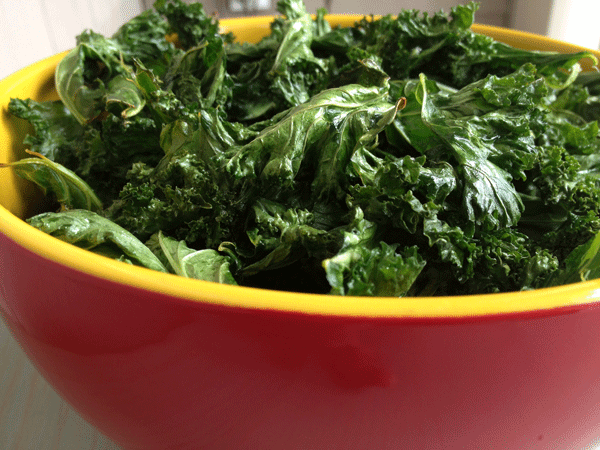
Last fall, I was visiting a sister of mine in the state of Washington and she served us a light, crispy, green “chip”. It was salty and delightful to eat because of it’s mild flavor and satisfying crunch. The chip was roasted kale and it was a wonderful alternative to potato chips.
Now, whenever I have a craving for salty chips, I make roasted kale! I am personally addicted. I prepare it at least twice a week and I’m waiting for the day that my son says – please, can you make something else! Luckily, he is a kale chip fan too – at least for now!
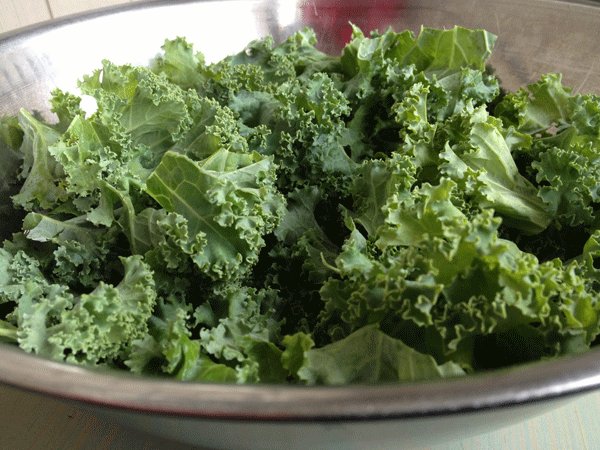
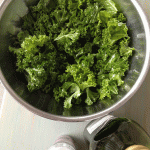
Remove the leaves from the stalk and tear into bite size pieces. Drizzle with olive oil and your favorite salt. Using your hands, toss the leaves until they are lightly coated in oil.
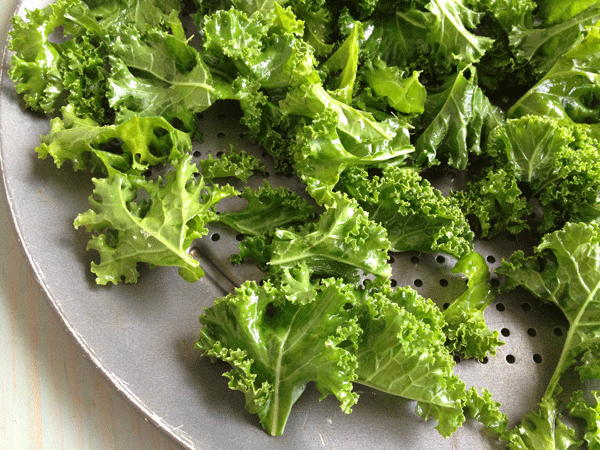
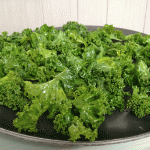
Evenly spread the leaves on baking sheets. It you have a pizza pan with perforations, use that as your baking sheet. It is not necessary, but it does work best.
I bake the kale at 300 degrees, but you could use a lower temperature. If you go as high as 300 degrees make sure you keep a close eye on the kale. Check it at least every 5 minutes until it is dry and crisp. It will be done in 15-20 minutes depending on how dry your leaves were when you started roasting them.
Remove from your baking sheet and enjoy. It really is that easy!
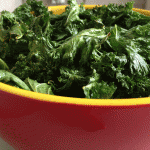
Update: Today I tried something new! Instead of using olive oil to lightly coat the kale leaves, I used melted coconut oil! It was delicious! To find out more about the merits of coconut oil, check another post of mine – Coconut Oil…Coconut Oil…I love Coconut Oil!
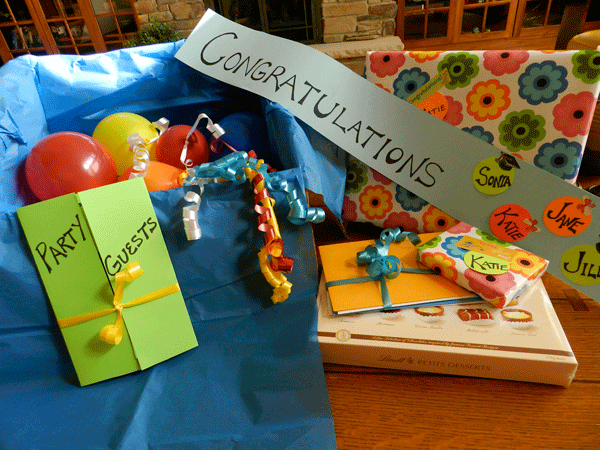
A gift that is a party and present all in one! Great for graduations! It’s one way to put a fun spin on a monetary gift! To find out how to put one together, check my earlier post – Party in a Box Gift

What do you give to a new college graduate? Here is a fun idea – My nephew recently graduated and I wished to give his gift of money a creative, fun twist. I purchased a dress shirt and on a card I wrote: “Now that you are a professional – the girls are going to expect a higher level of elegance on your dates. Here is a ‘Date’ shirt and $ for you! Congratulations!”

Gift Ideas for High School Graduates
Above is a gift I prepared for a recent high school graduate. He is heading off to college in the fall and I wanted to help him prepare by providing a few necessary items for his dorm room! Really – I just wanted to make giving a monetary gift fun, as you can tell from my “gift tags” and my choice of items…..I do whatever it takes to make it entertaining! To come up with a possible list of items to include in a future college student’s gift, I probed the mind of my daughter (former freshman, now junior college student). Here is her list of dorm gift ideas!
Extension Cord
Command Hooks
Febreze
Hangers…lots of hangers!
Plastic Silverware…her quote “because you know you won’t do dishes”
Set of tools…she used these many times!
Desk Lamp Desk Organizer
Highlighters/Pens/Pencils
Sticky notes
Shower shoes
Shower Caddy
Alarm Clock
Framed Family Picture….picture of mom (that was my addition, not her’s)
Money!
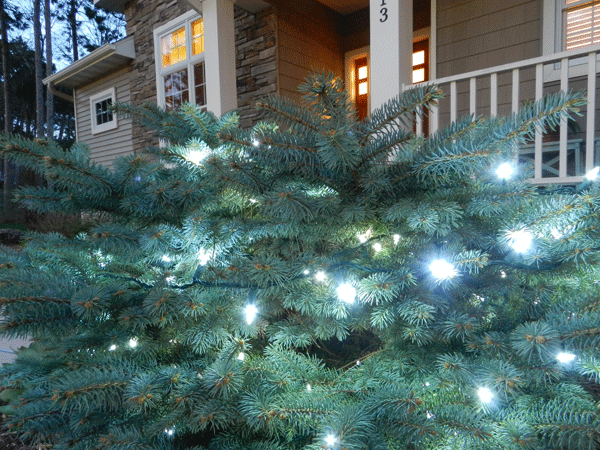
If you are ever a visitor at my home in the evening, you will be greeted with white lights shining brightly from a dwarf spruce tree planted in my front landscaping. Whether it is December or July, the lights will be there.
For the Christmas season, I hang lots of lights. They cover the entire front landscaping, outlining the front door and brightly shining in the garland that hangs from the porch railing. But for the rest of the year, this one tree will be lit with led lights connected to a timer set to come on at dusk and stay on for 4 hours.
Why – you ask. For my friends and visitors, the lights feel welcoming. To anyone with dishonest intentions, I hope it makes the home feel occupied, like there is a presence, even if there isn’t.
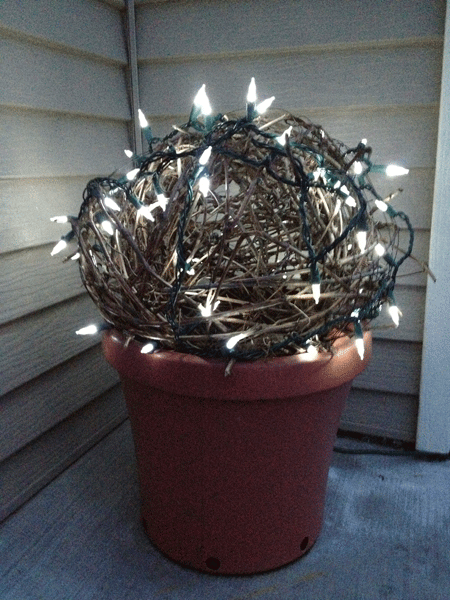
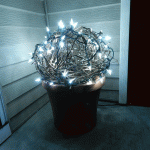
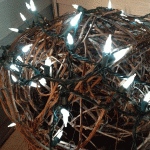
At my back patio door, I also have lights. Just a few. In the winter, there are pine boughs in a pot. In the spring, its a grapevine ball (in a future post – I’ll show you how to make these! So check back! ) In the summer, a lighted trellis is tucked into potted plants. I will always leave them there because I know it comforts my neighbor, who is sometimes alone. She has commented, more than once, how she appreciates them.
It turns out, I’m not the only one who finds comfort in lights!
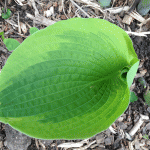
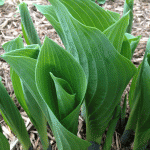
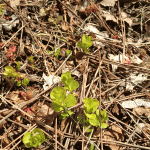
This time of year is a great time to divide your perennial plants while they are just popping up after a long hard winter. I have many hostas in my yard and this year I want to plant a few in pots to help decorate my front porch. Last year, a friend of mine adorned her front steps with potted hostas and it was lovely.
The best part is – if you already have the hostas, it costs next to nothing!
The biggest challenge to this project is getting over the fear of hurting your plant – it will be fine. You will only be stealing a small part to use elsewhere.
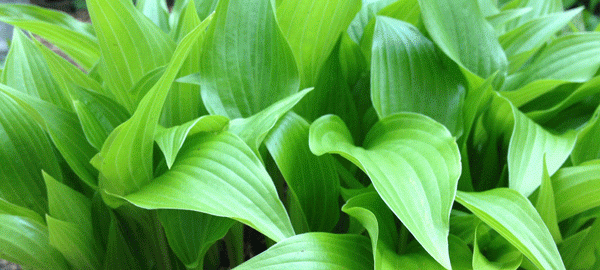
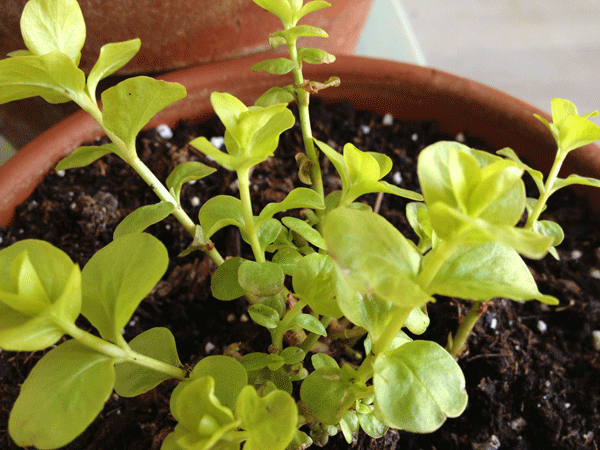
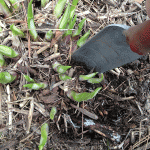
The Creeping Jenny, shown above, does just as it’s name implies – it creeps everywhere! The vine branches spread out and will re-root creating another plant.
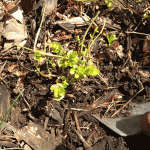
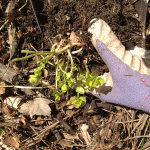
Find one of these, dig straight in with your trowel and gently remove the plant, disconnecting it from the connecting branch.
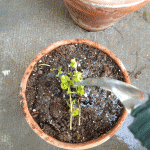
Plant the vine in your pot keeping the level of the plant the same depth as it was when you removed it from the ground. Water it well. I like to fertilize with a root stimulator to give the plant a good start.
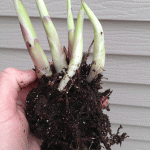
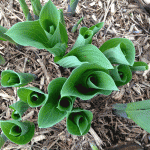
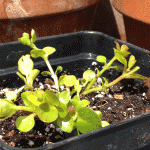
To split a hosta, dig in with your trowel and remove a section of the plant. In the picture I have 5 eyes from the hosta, but you can take as much as you want. Sometimes hostas get so large that you may want to divide them into multiple plants. In that case, you can dig up the entire plant, divide it and replant a smaller section back in it’s spot.
So many options – what will you do!

Last fall, I purchased a bag of white tulips on clearance with the plan of forcing them in a pot. I tossed the bag in my garage, so they could experience 12+ weeks of cold!
Tulips need to experience winter weather in order for them to bloom and this year that was not a problem – many, many, many weeks of cold winter weather!
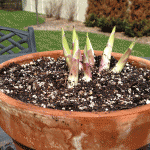
Patiently, I waited until March when small signs of springs were emerging to plant my bulbs in a pot.
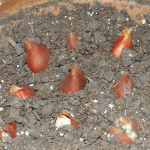
Following the directions on the package, I knew my particular tulips needed to be planted 6 inches deep. I half filled my clay pot with potting soil and tucked all 14-tulip bulbs into the soil – bud end up, rounded end down – it matters! I then buried the bulbs, watered my pot well and placed it back in the garage.
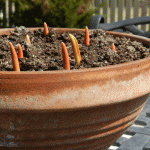
Two weeks later I checked my pot and voila – tulips were popping out.
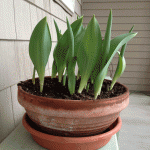
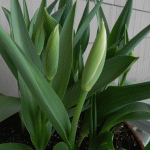
I moved the pot outside on my porch and continued to wait…
And wait…
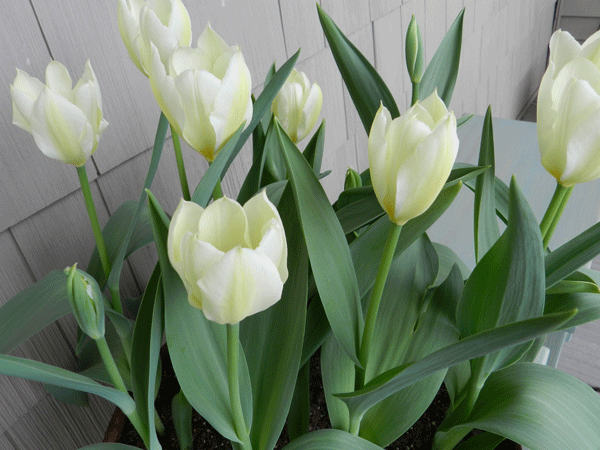
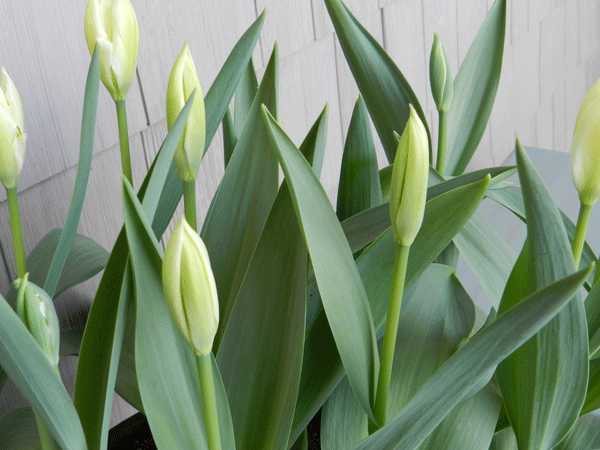
Beautiful!
I’m doing this again next year!
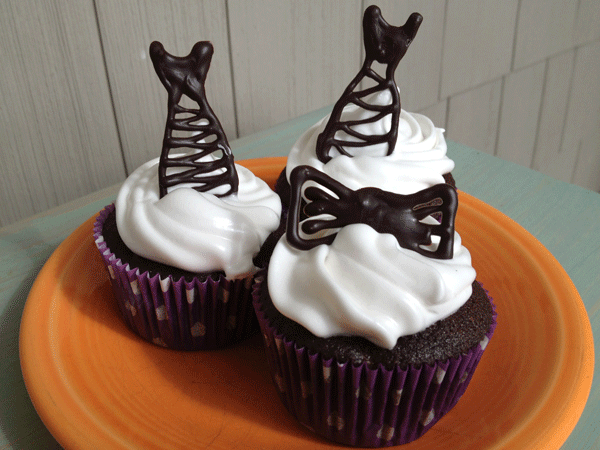
It’s the season for prom and what dessert could be better than cupcakes? To me, the best part of eating a cupcake is – No sharing required!
It’s the one time when eating the whole cake by yourself is completely acceptable!
The recipe I prepared was Ganache-Filled Chocolate Cupcakes with Seven-Minute Meringe Frosting because it is my son’s favorite. It was his prom after all, so I guess he deserved some say!
This recipe is fabulous and produces a deep rich chocolate cake filled with a creamy ganache and piled high with light as air, velvety, meringue frosting.
Wish they were bigger – no worries – just have two, three….
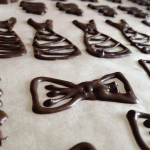
Because the cupcake’s frosting was white, I wanted to embellish it with a chocolate garnish. I struggled over what to create until my daughter suggested making bow ties and dresses. Brilliant! I immediately set out to do just that!
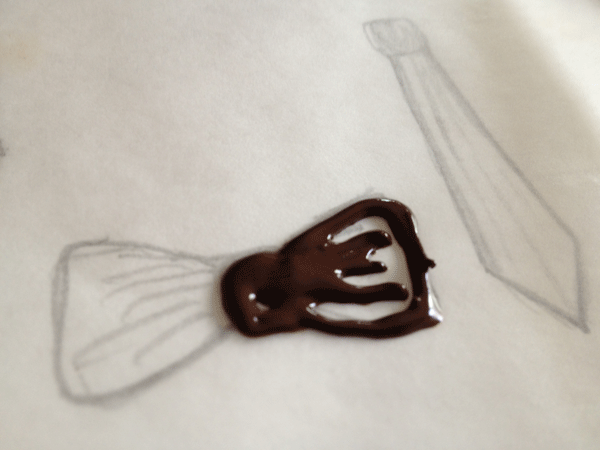
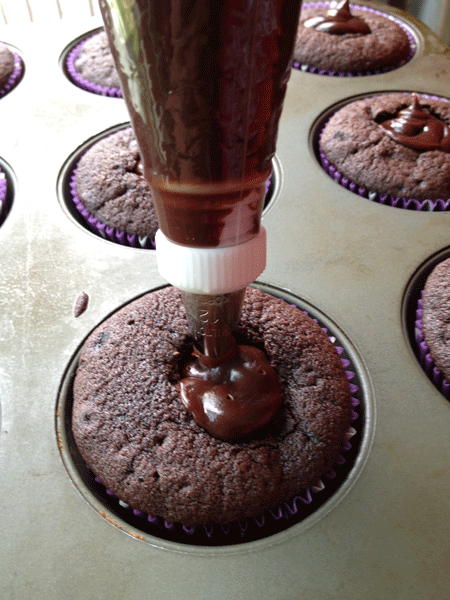
I began by drawing an outline of ties and a dress in the sizes I wanted the garnish to be. I then placed a piece of translucent wax paper over the drawings and the pencil lines were clearly visible. After filling my pastry bag with melted chocolate, I piped the chocolate onto the sheet of wax paper using a small round decorator tip. I simply needed to follow the lines and voila – a super easy and very fun garnish.

Once the chocolate hardened, I eased them from the wax paper and gently pressed them into the frosting. So fun!
This easy garnish would work well for any formal occasion especially weddings, engagement parties, wedding showers, anniversaries, prom…..